EDISON’S RIDGE CG
13 Night I
JP playing US Marines
THOUGHTS
I was shocked at the way his aircraft swept me off the mountain and I am currently in full damage control. If he does one more big aggressive push my losses will be too much and I will probably surrender. With this in mind my role will be to survive long enough for my reinforcements to get to the front line and bolster my sagging morale.
BUYS
17+3=20CPP
1 OBA left from last game + 1 PRE REG
(1) +1 SAN INCREASE
(6) 2x FPF BARRAGE
(10) 2x I4 MARINE RIFLE PLATOON (6x 458, 2x 558, 9-1, 8-0)
(3) HW2 RAIDER MG PLATOON (Reserve)
I went for numbers of squads rather than firepower and elected to get 2 marine platoons. I have 2 FPF’s to help shorten my defensive line and thereby allow me to have squads stacked together for safety.
INITIAL SETUP
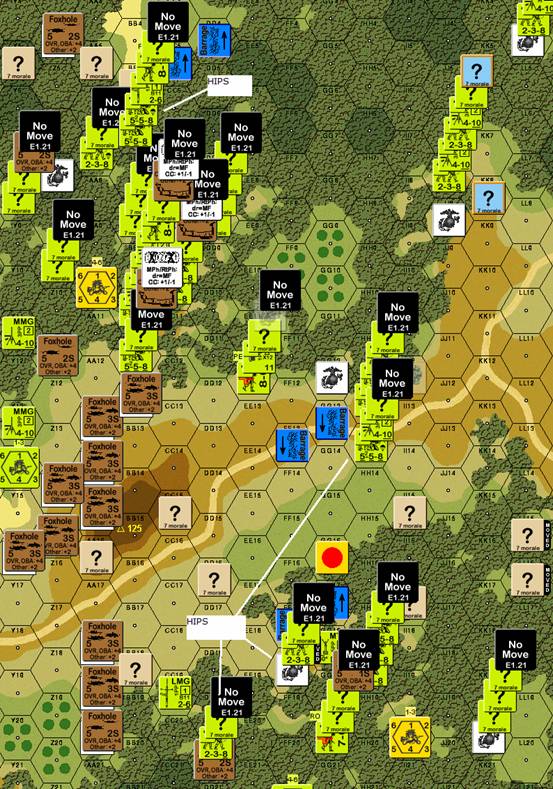
TURN 1
He only moved a few troops and I was happy as a full attack could have devastated me. In my turn I set my FPF’s off and sat and waited.
TURN 2
He moved a bit more and walked next to BB6 – I fired to no avail (this is where I have 2 HIPs so I want him to try to CC me) He is just feeling out my defence.
TURN 3
He kept moving and had sent a few cloaking counters north to threaten my entry hex.
TURN 4
In his advance he advanced into the BB6 hex and my HIP 8-1 and squad exposed themselves in support of the squad that was there, I didn’t get ambush and we both lost a squad while I also lost my leader. In the adjacent hex he also killed my HS for no loss. At least I now get freedom of movement.
Unfortunately one of my leaders to be freed of the No Move was in the trench network so he stayed and waited while my (I thought…) 2nd best leader was manning a phone for my OBA (EE12). This guy I tried to run to GG12 and thus free up the mass of troops here, but he was wounded and the terrain meant I had to try to go through my own FPF – naturally he died, one should never tempt the gods. (I had forgotten that my best leader was actually HIP in HH18 and the VASL had done a turn and not stacked him with the squads in that hex so I did not notice him there until much later.) The last unit left alive in BB12 moved away and my Marines came onto the board looking for revenge.
START OF MY TURN 5
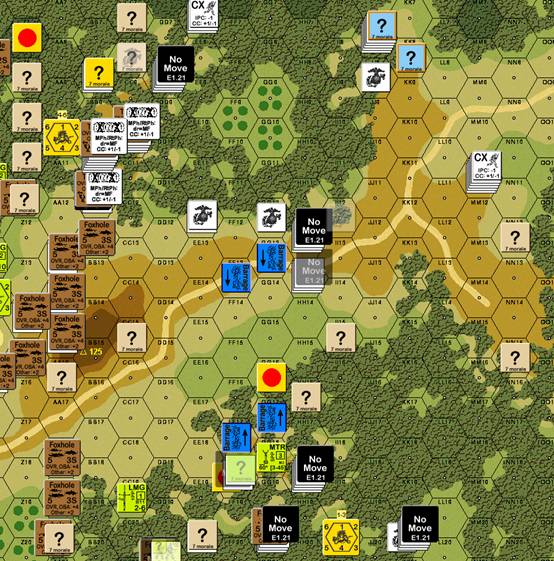
TURN 5
Things are going well, the cloaking counter in NN12 will die next turn (1 HS and a reduced squad). I am ready in my trenches for his assault.
TURN 6
It started out like any other turn and by this point I felt that he was not too happy with the idea of assaulting my trench complex (5 squads and 2 MMG’s) and no wonder but, during his movement I scored a hit on one of his guys and they turned berserk charging all the way into BB11 (even TPBF/FPF only caused a CR) meaning that this vital firegroup who were controlling the hill side were unable to fire outside of their own hex . He decided to “pile on” and sent anybody within reach to attack BB11. In his CC phase the berserker killed my leader and one squad – but there were still 2 left in the hex.
In my turn 6 my trench guys blasted at everybody adjacent and caused 2x striping and one CR – thanks to a miracle ROF on a MMG. I started moving troops closer to this area and in his defensive he broke 1 squad in BB11 (Only 3 good order squads left defending the trenches now)
In my rout/advance I put my broken guy in BB10 along with 2 squads and 2 MMG’s (the Alamo……hopefully with a different ending) and I also advanced 1 squad into CC10 where a striped 1st line CX IJA unit was on top of the wire. I didn’t get ambush and with –2 for CC against wire/CX he died with no loss to me, a minor miracle.
TURN 7
Alas, in his prep my last thee squads in the trench area (BB10) all broke and, with him able to surround them that would be four squads dead and the vital counter attack area in his hands. (I had always planned to use the trenches as a way of getting back onto hill 125). Thanks to the “No Move” rule and VASL hiding my best leader I will also have 3 squads and a leader isolated at HH18 and thus decided to offer my surrender.
LESSONS LEARNED
Keep together for big stack safety.
Always get concealment before moving adjacent in the jungle.
The IJA just keep coming, they don’t break (much) so a fluid defence where you can break, or move away and make them keep chasing you is a lot better than fighting it out face-to-face.
I would recommend that an American player sets up in 12N around the northern end of hill 100 you must lose the 19 points worth of troops so you can get FB’s or HMG’s to defend against the Japanese FB’s in 13D turn or you will get swept off the hills.