PEGASUS BRIDGE
CG I
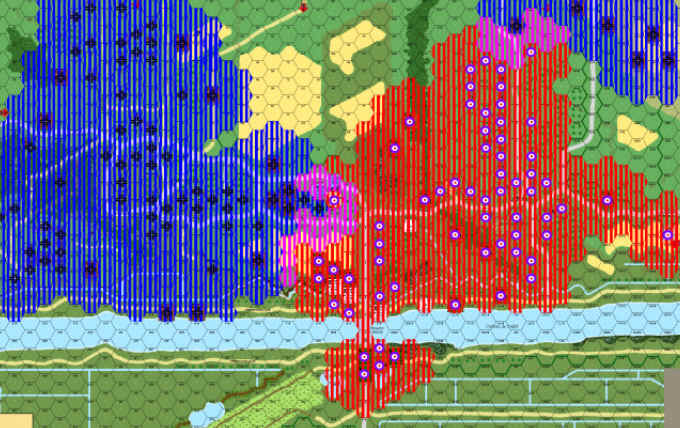
Zones of Control – Game by Game
Blue – German Control Zones
Red – British Control Zones
Yellow – No-Man’s Land
Night I End
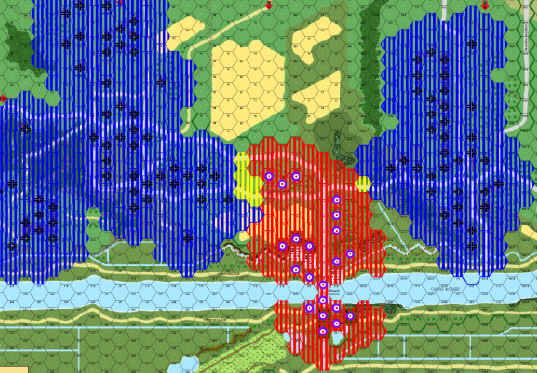
The British land and manage to take the Bridge Village and the vital school-house, but neglect to make a run for the Chateau.
The German’s conscript forces are no match and go scurrying back as fast as they can, few manage to escape though.
Night II End
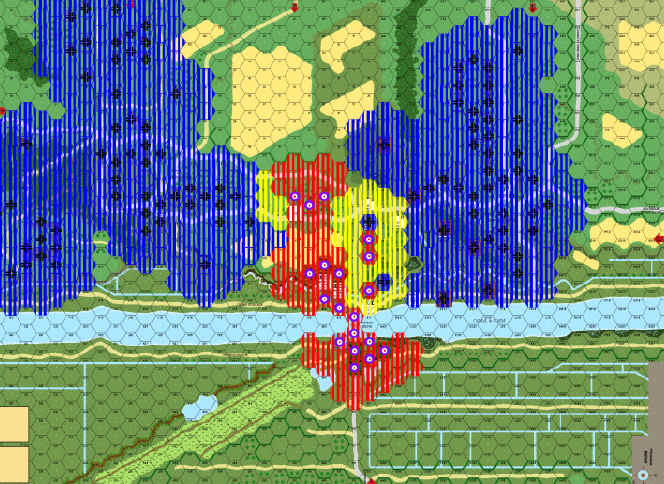
A German counter-attack manages to grab territory and limit the British setup for the Night III game, it all looks great, but was the cost in blood too expensive for the German forces?
Night III End
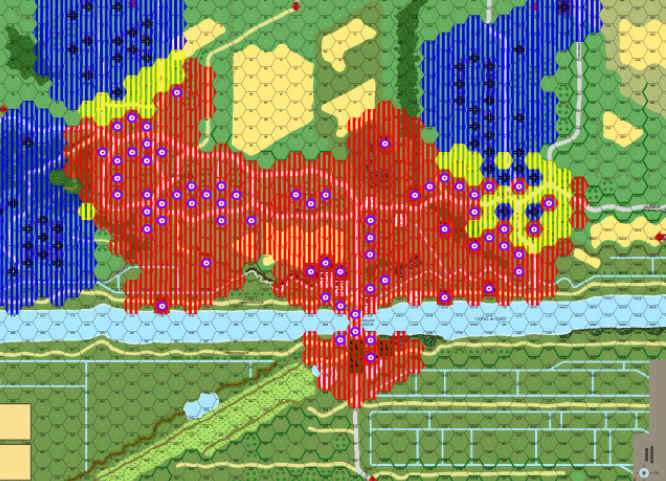
The German’s are hammered to such a degree that their commander considers suicide.
The Ox and Bucks are an unstoppable force and in the end are only slowed down by bad luck and a busy sniper.
The Le Port attack is progressing at a steady pace, but the Benouville defenders are no match for the excellent quality British troops.
The Germans manage to hold on to the Chateau though and also have enough control over the entry zones for their reinforcements to enter safely.
Dawn End
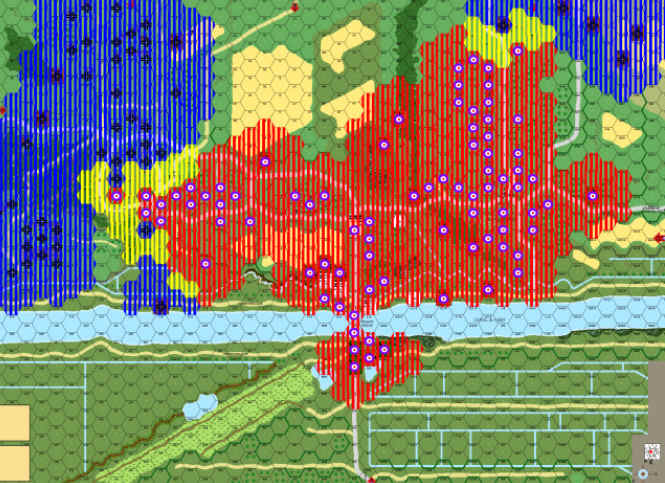
A bit of bad luck goes a long way and both sides are being bled here…
The British are facing the possibility of facing AFVs with reduced AT support and have lost men that they cannot replace, the German reinforcements just keep on coming though.
Day I End
Again a lot more blood-shed, but the loss of Benouville reflects the focus of our game on this village.
Le Port was barely a sideline act.
JP lost some great leaders this game, and while my cost in men was high I still have a full complement of AFVs and a wide area from which to start my next attack.
The British surrendered early in the Day II game