PEGASUS BRIDGE
CG I
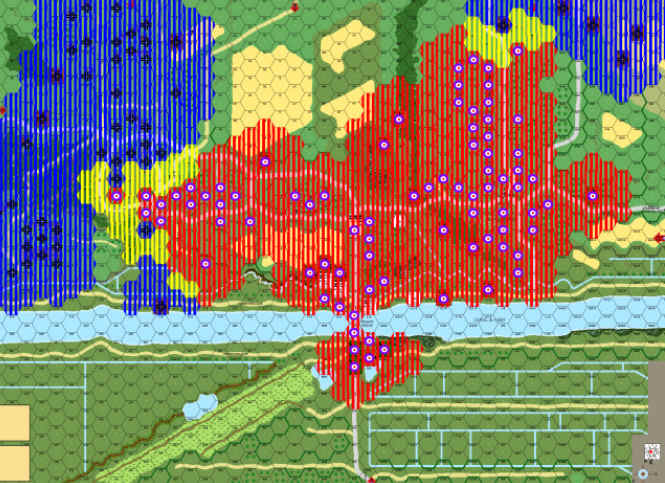
Dawn
Legion playing German
No matter how long or short a time one has been playing this great game there is one thing that is a constant. Always, always, always read the scenario conditions!
I had made 2 major blunders, one has been a constant:
#1 – The PB map is not as easy to read as a some others and I constantly get the Lvl -1 terrain mixed up with Lvl1 – that is dumb.
#2 – The other stupidity is that I did not realise I had reinforcements due this turn until I was about to post my log file to JP – that is dumber.
So, ditch the gloom and doom, the Germans are back in town!
Exposed Fortifications
Wire: W17, X17, Z18
Trench: V16, W16, X16
Foxholes: 1S: E5, D7, L18, M3, AA9, CC12, EE14, EE18, GG15, HH17
HIP due to no LOS: 1S: II2, OO2
Mines: 1AT: Z12, BB13, CC18
Benouville Garrison
Rue Haute Area
I4: 447, 8-0
M3: 237
Château Area
D13: 447
E15: 447, LMG, dummy
G16: 447
H16: dummy
HIP: E14: 447 MMG, 9-2
Le Port Garrison
KK1: 38H 735(f) (CA EE 12/13) (TCA JJ1/KK2)
MM1: 7-0
MM2: 38H 735(f) (CA LL2/MM3)
OO1: 447 LMG, 436, 7-0(w)
OO2: 447 LMG, 25-S 739(f) (CA: NN2/OO3)
HIP: MM1: 447 MMG
Reinforcements
13 Pz Gren Coy Full 12x 447, HMG, MMG, 2x LMG, 8-0, 6+1(!)
5 Pz Gren Pltn Full 2x 468, 2x 447, Lt MTR, LMG, 8-1
6 AAtr Pltn Dep 3.7cm FlaK LKW, 2cm Flak LKW (enter at J1+2CPP)
1 15FPP
= 25CPP
Obviously none too happy with the terrible leaders and the Depleted AAtr Pltn, but no point crying over spilt milk!
Initial Objectives
Benouville
I need the Chateau, as it is an effective springboard into the Benouville town and towards the bridge, it also dominates the battlefield as the high ground. If I can secure the road that leads to it from the A7 entry area then I shall have a chance to bring my AFVs to this potential breakout point.
The Rue Haute area is important too, as a counter attack can be launched through here the entry areas here. It will be the main entry point for my reinforcements at a later date; if he does not have AT guns covering this road now (my error in judgement, see later explanation), he will later if I let him stay.
So I shall make sure I defend the Chateau, but also try to push from there, once it is also secured, along the road and back into some of the buildings I just gave up. At the top of the map I shall attempt to keep from losing any more troops, whilst also using FGs and MTR fire to try and keep his head down… I would not put it past him to attack ‘to tidy his lines’ but it is by no means a certainty. I have a dummy stack to send down the river road towards the bridge, as the area there looks too undefended for my liking!
La Port
I am going to pull out of the town, I cannot defend here at all and there is no doubt he will attack again. I am going to make a strong point on the hill around the freshly dug foxholes where I shall be safe from his ATs and also safe from his FGs; the orchards stop him from gaining LOS from anywhere he currently holds. He will be unable to charge me as I have the ability to hit with MMG or AFV fire any of the buildings he might shoot from, and my vulnerable troops will be beyond the crest digging more foxholes! I shall give him the village and hold out as long as I can… if I need to reinforce, or can reinforce later then I shall… but don’t hold your breath!
General
I have to hold my positions at the very least, and in the best-case scenario I will be able to link Control Areas in Benouville, protect my entry road hexes and re-take some of the village
The Game
Turn 1
Entering the board with the reinforcements. I move the HMG, MMG, and LMG along with the 8-0 and 2x 447 and a 458 through the woods (from A11 to D12), the 6+1, MTR(dm), LMG and 3x 447 do likewise (A10 to C12). 2x 447 go to the water-tower (C9) and with CX I send the 8-1 with MTR (dm), LMG, 458 and 2x 447 to the Rue Haute woods (D4 – AdPh: 467 LMG (D5), 468 MTR, 8-1 (E5) and the other 467 gets ready to enter the village D3). I also bring on the 20mm FlaKLKW by driving into the grain fields above the schoolhouse side of the village (M1 to N2); this is to cover the flank, check to see if there are any ATGs zoned into that area and also to support the M3 HS. I want him to fear a mass influx of units up here; he will be doing the maths and noticing that about 12 MMC would have entered by now, so he will be aware there are still some points un-accounted for, also he will be aware that I might have up to 3 more of these AA Trucks in reserve.
La Port spreads its units out. A 436 runs to begin digging foxholes in the grain (QQ4), I likewise send the wounded 7-0 and 447 LMG to do the same (RR2). JP is doing his shoot into possible HIP locations again, which is really nothing more than a time waster and SAN maker (as we saw with the very first attack; the SAN Pin’s a 648 LMG in MM15) – but it makes him happy, so why say anything.
My 20mmFlaK LKW opens up on a nearby ? (N4), misses, but acquires – ah… the joy of no more stinking night, AFVs finally mean something again. I acquire a few more building hexes in La Port to keep him on his toes (GG4, HH5).
You have got to be kidding… he gets his 5th Civilian Information roll from 17 turns! What are the odds of that!
Thankfully it was ‘reveal hidden fortification’ and this exposed one of my out-of-LOS foxholes (II2) and was therefore nothing important! (Thankfully it wasn’t ‘reveal HIP’). He digs a foxhole of his own (BB7) and does not Prep, so no more free SAN I guess. He also removes some AT mines (Z12 – pity I was hoping they would funnel his own attack).
Movements were consistent with what one would expect. Moving units into La Port; slowly and mutually supported in case of HIPs. A very nice move was the placement of a HS in the steeple (II13), this will be his spotter and LOS remover – nasty fellow; I shot at it with my 47mm AFV (OO2) and missed, but will be happy to plug away until I hit him or another target shows up!
Benouville did not bring much more movement, it is my guess he is going to play this defensively and that means keeping quiet. He did move a ? unit away from my AA Truck (N5 to M5), but was exposed as a dummy; could I have opened the door to his flank? Yes – if I had units enough to move in there! The AA Truck fired at an exposed 648 PIAT (K8); achieved –2aqr, but missed the hit. I re-mantled a Lt. Mtr (E5) but most importantly I have discovered the location of his 2 ATGs, for some reason he had put them on the other side of the bridge (V20, W21!?), I admit that baffled me and I will be interested to read his AAR to find out why he did this! (Read note at beginning of AAR, especially the bit about always reading the scenario rules! I just didn’t bother to read note 3 of Q9.6152, my Very Bad.)
Turn 2
In half a mind as to whether I should bring on my remaining 5x 467 MMCs; JP will certainly be counting up my forces and wondering what I bought, it might do to keep them off for another turn whilst I prepare for an attack in the next turn. I do decide to bring on the other AA Truck though (37mm AA LKW entering on H1). I prep with the AFV (47mm) at the spotter in the steeple who is there to strip ?’s as my troops unsuccessfully attempt to dig foxholes (RR2 and QQ4). I also unsuccessfully fire the 20mmAA truck at his exposed 458 PIAT (now in J7). I OppFire the Rue Haute Woods units – 467 LMG (D5) and 468 Lt MTR, 8-1 (E5) – so I can shoot without the CX modifier and after he has hopefully lost his ?.
Movement brings my HS out of its foxhole to enter the 20mm AAtruck hex; he will attack the truck when he gets the chance. I also bring the other 37mm truck in as far as H4, that way I can cover the first major defender in his building (I8) without being too exposed to PIATs. The remaining 467 up there moves from the woods (D3) to the edge of my controlled building area (G5). I send the 467, 458 from the waterpower towards the edge of the Château forest (E9 then F9 in Advance) – I am worried in these woods, he has left gaps and I do not doubt that he has spent heavily in buying HIPs…I have to pressure him, but I want to try and do it by moving to the edge of his possible HIP area, by the time I finally get to the edge of the city many of his defending units will be exposed (and hopefully in full flight, but I could be dreaming on that one!). In line with this I CX the 6+1 and 467 Lt MTR (dm) all the way to the Château Gardens (F15), after the next movement phase these guys will be able to start to interdict the bridge area with MTR fire (hey, it’s crappy FP I know, but it is at least SOME FP and it might stop him moving his ATGs due to the –2 Hazardous Movement they get whilst pushing). The Dummy stack AMs to the top border of the Château Gardens (I15 – don’t trust this tree line either), as does the 436 next to him (to H14). I send my killstack HMG, MMG, LMG to the stairwell in the Château (D13), but not up the stairs until advance, in case he is able to see me, I still want to keep the ? until I choose to shoot. Finally I send the remainder of the 6+1’s stack (467 x2, LMG) along the Château Forest path (E12).
His DFPh was terrible, with gun breakdowns being the order of the day, losing both the German and a Brit AT to 6,6’s (personally I would choose to ignore the first British AT breakdown, it is just crazy that a gun should be taken out of the game before it even gets a shot – he declines my offer to ignore the breakdown in the interest of fairness and balance).
My AdvFPh also failed to get results, with his positions in Stone Buildings being more than I can take on right now. I have advanced close up to
Benouville border of the Château Forest (G12) with a 467, LMG, 467 and also with a 447 (G13). I have to push him now, and since he will be afraid to lose more troops I think he might allow himself to fall back some way – more important than anything else is to retake some of the town and therefore protect the entry areas…
Well, his turn starts poorly with his AT scoring the dreaded ‘6’ and going bye-byes (again I offered to let this go, again he declined; honourable men are few these days). This is somewhat compensated for by the destruction of my 20mm AA LKW by the his pesky Avenue De Caen defenders (J7(1)), and the breaking of a pair of 447s (F12) in the Château Forest by a 9-1 and a pair of MMCs (G12). This was just stupidity on my behalf, rushing though the last turn without thinking about the consequences of not splitting units up when assaulting a position, though I am surprised he is standing up and fighting, a couple of breaks and he will be in real trouble.
His movement is a general and slow exploration of La Port, with the exception of a few squads peeling off to probably guard the reinforcement entry area (TT14), he is sending quite some troops over towards Benouville, but not moving anyone in Benouville itself.
I shoot and miss with everything (not bad – three 11s in a row, a 10 and a 7).
Turn 3
Well, no more stuffing around, I have to bring on the last of the reinforcements. I think I have made some poor movement choices in the past turn and this will cost me if I cannot start to get this game moving… His advance pulled a 648 PIAT back from I8 to J7, placing 2 MMC here for me to try and hit… so I fire in Prep and score a successful PIN on 1 of the units. The rest of my shots miss (AFV at the steeple and also at his approaching units in La Port – LL7), at least my foxholes are now dug (QQ4 and RR2).
I have moved to attack now, by sending a MTR to the Château Garden Wall (H16 and then I16); from here I can cover a lot of ground with an ineffective weapon that still cannot be ignored. To cover him I am using a 447 LMG and 436 to make an apparently menacing move towards the nearby ? (K15) I also have the dreaded 6+1 ready to advance (to I18), again another feint this time towards the river foxhole (L18) – hey, if he gets there and it is unguarded I can improve my position in a major way if a MMC can follow (this was stopped though by his AT stripping me of my ? and acquiring me). Anther feint is a dummy stack move to the forest border with Benouville (I14). My killstack is now FINALLY in position after advance (in E14(2)), from here I can hit almost everything he has got around or moving towards here. A 467 that broke last turn rallied immediately and he, along with the HIP 447 MMG (E14(0)), have moved into the Château Forest (F12 then G13) to harass a menacing stack (I12); he now has 2 major stacks facing him down though they are also there to get the 2x648s and leader that are patrolling the edge of the forest off my back. I brought 3x 467 from offboard to the Forest (CX: C11 then D10), while the other 2MMC also come on CX to prop up the Rue Haute area (E3). There were many minor moves as I tried to split my guys up – his defensive fire will not be pretty and I have little protection. I also sent a 467 to claim a building near the Forest (H9), the other 467 kept his ? by AM-ing and then advanced in there as well. I FINALLY feel like I am building some momentum as I have re-taken 2 locations (I10 and H9), and he now has ~5MMC effectively cut off (2×648, ldr (G11) and the MMCs in the Avenue De Caen (J7/K8) building).
He must be starting to get a little worried as I can heat shovels striking earth (W10, S10 and 0012); though why not – he has no idea where my attacks might come from in the following games. He Pins me in I10 (from 2×658, 9-1 in G11) and acquires my FG on the level 2 of the Chateau with his AT.
2 units managed to escape from the Avenue De Caen building (J7 to K9), and this is a disappointment – I really hoped to be able to gun them down. The general advance in La Port continues, helped by the malfunction of the MA on one of my 37mm AFVs. He is also sending some units across the open fields towards Benouville.
Defensive fire brings a barrage of Lt MTR down on the gullies near the river (T17), eventually Pin-ing a 658 there. The rest of my attacks (including a 16FP +2 from my killstack in the Chateau) were all misses, but the heat is on!
Turn 4
Still, lets face it, attacks are no good unless one gets results, and I am not getting the kind of hits I need to break his defence open in Benouville. I prep fire with the Lt MTR at the Crested units in the gully (T17) and miss. The AFVs in La Port gain acquisition on the JJ3 building. In Benouville I open up with the massive FG (I am getting more sure that he has a HIP FG with a good leader here somewhere… he is being too complacent and has basically allowed my FG in E14(2) to get here ready to shoot) at 2 MMC with PIATs in J9, both are just PINned. G13 (MMG, 2×467) goes Opp Fire, just in case there is something interesting popping up, he is still pretty well covered by ? counters.
Again it is time to move… and my patience (always limited anyway) has run out. I start to charge the 2 units in J7, bit by bit, trying to get him to use up his FP so I can move my AAtruck and other units with a relative degree of safety – but the initial movement brings a break and he still has a MMCs full FP in reserve, so I content myself with preparations to assault after softening him up some more. I have chosen to basically ignore his 6 high stack in I11, he has not used it when he could have and that is not like him – JP knows that FGs are not for keeping as antiques! I put my ? 467 in the village hotspot (I10) whilst also keeping the other 467 here. E14(0) has moved to E12 to cover the forest in case he tries to make a grab for CPs with his 9-1 group. I have also moved to secure the flanking building (M6) and check the orchards surrounding it for nasty HIPs.
In La Port my Broken MA AFV pulled back to the hill, and I sent a 447 LMG, 7-0 to dig more foxholes and claim more of this territory, also to make him fear my influence on his entry hexes for Day II.
Well, his defensive brought out a bit of a shock… of course there was the ‘secret HIP’ that we all knew was there! But when it shot it HOB-ed the 9-2 leader in E14(2), causing a Berserk! All the units went with him! And this just might decide a fair bit of the game! Of course this FG then manages to get 3 successive shots with just LMGs and therefore smashes all the units that could possibly counter-attack it… something my HMG, MMG and LMG group couldn’t manage to do in either of their attempts. Spraying fire from a now revealed 2×648 LMG & 9-1 (K15) expose my dummy attack and PIN a 436. And his PINned 2×648 (J9) manage to blow away my 2×467 (G9) – 2 breaks. It is amazing how 1 turn can just provide a run of DRs all lower than 6 and force him from defensive to offensive… while my FG shoots and shoots and cannot even dirty his uniforms – and in our CGs it just happens all too often for my liking.
In my pissed off state of mind I charge the massive ? stack that have done nothing since the game started with just a 467… maybe I can at least expose some dummies (was a 7-0, he dies quickly and quietly, it was too obviously a dummy stack)! Grrrr… Not only does he get attacker info AGAIN but I also fail to rally and/or fix the MA on my AFV (but at least I haven’t lost the MA yet). His prep breaks and ELRs a 467 (in I11).
During movement he starts running guys in the open (at long range) down the middle of the road; I score a k/2, but the 2MC is safe for him – at least he now might have a little respect, though respect is not going to stop reinforcements. He is pulling troops closer to Benouville, no surprise there, and my defensive fire does nothing more that cause a PIN – no surprise there either… the game has gone from me pushing him back to now being in desperate straights and possibly facing the loss of more territory than I started with. He has pulled all his guys back to cover the approach of my berserk units, this will give him 3x 648 LMG & 9-2 (25FP, [50FP adjacent] with –4 [ldr and FFNAM/FFMO]) in the target hex and another 2MMC & 9-1 (12FP [24FP adjacent] with –3
) in the hex adjacent to the target hex… plus there are more units on the way. Another roll of 5 assured the breaking my remaining unit in the Benouville Forest (F9); this will open up my CPs and stop me linking my locations in the village, it will also allow him to cover my AFV entry point – unless I can find a way to stop him.
Turn 5
I manage to rally in the Rue Haute area (I6) and the HS MMG (E14(0)) also rallies, the MA on my AFV is still out of it… things are not looking good! At least he has pulled out of J7 to K8, I have –2aqr here with the 37mm AA truck and blast way… on the second shot I get some just deserts with a snake-eyes critical hit, the result of this is the death of both units in this hex and the end of a major thorn in my side (literally).
Movement is tricky; I have made a successful grab for the river (L18) foxhole and so tried to rush the unit in the open of Rue haute towards the water tower (F6 to C8) but he broke me in E7. I have taken the J7/K8 and I8 buildings; if I can maintain my hold on C9 (water tower) and the D7 foxhole then I shall have secured my entry areas. My cannon fodder berserk guys are currently in the midst of the forest killing small furry British-looking animals (F12) and still out of LOS of the FGs, but not for long… I really cannot think how to save them. His 9-1 and the 2MMC in the forest region are just causing too much havoc and I don’t have the resources to deal with them (I have 6MMC broken at the moment and am really relying on the 2 broken guys in E12 rallying [I sent the E14(0) leader there] or I might be in even deeper trouble). I now have a HS on a MMG in the upper floor of the Château (D13(2)), they will enter E14(2) in advance and start to bring back some long-range FP to slow his reinforcements.
Just getting back to the 9-1 and 2x MMC’s that are currently roaming in MY forest like the Predator (alas I am no Arnie), at the moment I have one big chance to get them… hold them away from CPs and hope they die for being isolated at the end of the game! To tell the truth I have suffered most from these guys and the 2MMC that have been holding J7. A lesson to newbies; allowing a few units to be sacrificed holding buildings against even superior numbers who do not have the same sort of cover (or unfortunately in my case, cohesion) can really break an attack up. Of course it doesn’t help that even with 2FP +1 his Predator units are still able to get MC’s that break my units… (In the very next attack I manage to get ANOTHER 1,1 and break both leader and MMC with ANOTHER 6,6. I would be most happy if I could do damage to him without a 6,6 from him or a 1,1 from me!).
My 1,1 gave him a SAN and the result of it was the wounding of my 6+1, I have never had a 5+2 ldr before!
Are things turning around? I have fixed the MA on the AFV and 2 MMCs have rallied in the important E12 hex. Then in Prep his killer FG forgets that shooting through trees doesn’t work and wasted their devastating FP.
Movement brought a general motion towards the ambush for my berserkers, but it cost him as my lone MMG CR-ed a MMC running down the road towards the village and pinned a pair of HS also from a range of 20.
In La Port he made a move for the lone foxhole (II2) and despite the heroics of my AFV I did no damage from my hits on him… at least he does not suspect my HIP MMG in MM1 and has moved units away to search for the ‘missing HIP’. This HIP opened up in Defensive and took him out with a 1MC.
All his movement and turn has been preoccupied with organising the ambush on the berserkers… and this has allowed me (along with some phenomenal DRs) to grab more territory.
Turn 6
The crunch turn… it is time to get nasty and to see if he can destroy my berserk FG. I move the AA truck to the forest road (G9) to cover the escape path of his broken leader and HS whom I have surrounded with units (in E11 and F11). I run the 237 from the building on the edge of the village to the newly taken buildings over looking Benouville (M6 to L8) where he was shot at but passed the PTC. In the vicinity of J/K/L10 I make a massed attack, it costs me a 467 to a 1KIA but I have again surrounded him and again I grab territory. Finally it is also time to move the berserk units… and this is hard to watch as he puts down a First Fire of only 16FP of while I am 2 hexes away, rolls a 3 and it is game over (for them!) – 3KIA and the RS rolls a pair of doubles…
Defensive fire blasts away at my MMG MMC from the La Port Stables (HH4); (though we dispute the LOS it is eventually clarified by the real map showing a CLEAR shot – hmmm) anyway the 2MC just causes PINs. The rest of his shots are useless and my Advancing Fire is not much better. To make things worse while I am able to eliminate the 9-1 and HS I enter into CC with the remaining 648, and lose another 467 – bugger. A hint – never take JP on in CC, he is lethal.
Still, all in all this has been a great turn for me, I have claimed a ton of territory and hurt him a fair bit as well, he has to get through another game, DAY I, before the mass of reinforcements comes, and at this rate he will be hard pressed to keep a strong defence on both flanks, and I COULD just spend a few points for transport and troops and come directly down towards the schoolhouse… yes the game has balanced out again nicely.
The dr does not end the game, so we fight on. The first to fall in Prep (after I have a massive return of my forces due to rallying in the forests of Benouville) is my HMG carrying HS (he dropped the MMG and grabbed the HMG instead), ELR-ed from the K12 FG, nasty stuff…
He dashes as a stack from the La Port Stables to the outlying building closer to my hill (HH4 to JJ3), this is 3MMC, an 8-1 and some PIATs, obviously on a tank-hunting expedition. I miss with 2 different AFV shots but do manage to score a breakdown on the MA of my 37mm – bastard French crap tanks! He has pushed his remaining AT to quite a way towards the school house (Y14) – he loves pushing guns, does it all the time.
My defensive is partially effective with a break on the newly moved unit in trying to re-assert control of the buildings at the edge of the Château (K14); this means his East and West borders of Benouville are all broken units now – if the game lasts I might be able to squeeze him till he has no-where to go (the broken units have run back as far as L12, where the 9-2 is covering them. I aquire I11 with the AAtruck, this is currently my CP and if he wants it back he’s got to move into here!
CC leaves a 1:1 melee in the forest (F10), but I shall swamp him this turn (assuming the game don’t end). He advances a 9-1 and MMC into CC in the centre of the village (J10) and kills my 467 there for no loss of his own.
Turn 7
The leader with the MMG squad on the La Port hill rallied but failed to inspire his MMC. I achieved a HOB in E14(0), and the berserk result this time led to Battle Hardening due to the lack of enemy in LOS. His 9-2 leader was able to immediately rally 2MMC, those leaders are great, I wish I still had one!
Claiming WA against the units sitting in the open of Benouville (J10) I was able to bring down a 24FP FG on the 9-1 and 2MMC in that adjacent hex… even with a 10 I still manage to break both MMC, but not the leader alas… yet this has just cleared the last major hurdle in this area I feel, I can now say that (should the game continue for another movement turn of my own) I will have the control of the better part of Benouville and have a perfect springboard for the Day I attack.
In movement I rush 2MMC and a HS to the melee in the forest (F10), time to get rid of the last thorn in my side. I also actually have more unbroken MMC than broken guys for the first time in a long time, so I move to claim territory – unfortunately I am out of movement range, but just 1 more game turn… I move the AA truck to H11… and cannot say what relief it is to finally be able to have some room to manoeuvre! My newly battle hardened MMC rushes to support the lone unit trying to claim the buildings at the garden end of the Château (E14 to I15), where my lack of LOS foresight gets him CR-ed to a PINned HS by a long range shot from N11… bastard!
CC brings no result.
But the End of Game dr does!
Aftermath
We have just one CC to resolve, his 648 vs 4 of my units in the woods. Taking advantage of my overstacking he manages to avoid a CR. After trying for a 2:1 attack vs a HS last turn he suddenly decided to take me on 6:12, and miraculously pulls out a 1,1 to kill 3x MMC! A miracle, a shrine shall be built on this very spot! I finish him off with my last unit and he CRs that unit as payback. This was a very annoying way to end a game that has been beset by a series of stupid DRs but that is how it goes I guess!
The main point though from all this is that without the divine intervention that smote my 3MMC I would not have had the points necessary to gain the dr for the extra CPP’s and I certainly needed just 1 more point (for Plan B). I managed to get all my units (467, LMG and 37mmAA truck) out of no-mans land
(H11).
Dawn Game: End, turning back the tide
Conclusion
Interestingly, and you will have to see what JP says on this too, I feel that even with the loss of 3MMC in the last CC and the leader and 3MMC in the berserk incident (I lost half my reinforcements from a pair of 1,1s, more from just 2 rolls of the dice than in the rest of the game…) I came out on top of this scenario. He took loses that he cannot replace, remembering that the units coming on in Day II are leaving at the end of Day III, and that will leave just the remnants of these units to hold until the last lot of reinforcements come on in the Dusk game.
YET I would say that despite doing reasonably well in most of the games, ‘winning’ most of them, I am still losing the CG… his troops are just too strong, and despite my excess of SW I have few men to man them and now no leaders (an 8-1 is the best, I have 2 wounded leaders).
I am very pleased that I managed to secure my entry locations (A7 and J1) but with the location of his AT at the top of the bridge village I might have to re-think my ‘rush for the schoolhouse from U1’ idea.
I also kept myself from taking any losses in La Port, whilst digging foxholes to prepare for the last-stand against his throwaway troops. I held all the foxholes I had dug and I could not have asked for much more than that!
As for the major defining moments of the game…
There is no doubt that the 9-1 led stack of 2MMC in the forest and the pair of 648s in the J7 building were winners… these guys deserve all the credit for the way he managed to hold me off, they did all the work with the exception of the shot that HOB-ed my killstack. They paid with their lives for it, and those 4MMC lost will hurt him later, I think at the time JP pointed out that they were 20% of his forces! But still, I would certainly consider doing something similar if I were the Brits in this sort of situation.
The HOB result was just plain bad, there is no other way to put it… though I think right from the outset it started to get me back into the game as he immediately seemed to lose focus for the rest of Benouville as he prepared to gun me down in the street. That terrible loss did eventually manage to gain huge amounts of territory for me.
Despite all the rubbish that happened to me I still feel that the loss of his ATs before they even got into the game was unfair, but maybe that is the payback for my losses. There is no doubt the loss of the German and Brit AT will be a big decider in the Dusk game.
Just a bit of self-criticism here, I made some BAD mistakes and one of them was failing to read the conditions for the scenario correctly! Had I been aware of the inability of the AT to cover my entry area I would have bought Marders or PzIVs. I really stuffed around in the first 3 turns with movement and changed my mind after committing to a certain direction (getting to the Chateau), I could have been setup and shooting a turn earlier and this might have loosened the hold he had on the village.
All in all it is by far and away the best game we have played in the whole CG.