ASL100 – REGALBUTO RIDGE
Legion Attacking as the Germans
Chris Walton Defending as the British.
ROAR (G:B – 3:3) – 10th April, 2009
Played with 82 VASL Logfiles (Apr – May, 2009)
I played this scenario a long time ago, as a scenario from The General and lost it as the Germans. To be honest I cannot recollect how it happened so I am pretty-much going at this scenario blind. This is not a problem for me, it looks like a fun scenario and against a new opponent there is always an element of suspense. Obviously with the ROAR rating I have taken the ASL100 score, not the older A24 as I am assuming that the pro-German balance of the older version has been fixed.
Initial Thoughts
The Germans are attacking with Elite units across relatively open ground towards a British-held ridgeline. The Germans must capture that Ridge and so they need to get in close as fast as possible to start to find some of the LOS shadows which will allow them to gain a measure of freedom of movement without the British overwatch. Victory is given to the side with the most VP on the hill and double VP are awarded for units on the Lvl 3 Hills of Bd.
The forces are mixed with the 8ML being a constant for both sides and the British +1 HA TEM easily balancing the few +2 TEM Wooden Buildings available to the Germans.
SW are likewise fairly balanced though the 81* MTR for the Germans does allow for an extra column shift which is sure to prove useful. However in balance to that the British have one of their lovely 51* MTRs which constantly prove to be a thorn in my side. MGs are likewise balance, a single LMG extra to the British balances out their lower FP and shorter range.
In terms of man-power the Germans are blessed with an extra 9-1 and a pair of 8-0, though as the attackers this is fair. The Germans also have an extra half-Company of 838 Assault Engineers to aid with their SMOKE Grenades. While numbers of Squads are otherwise balanced it should not be forgotten that the Germans have +1 Range which can be a useful tool in open terrain games.
British Setup
I am a bit surprised a the British setup. They only have a few units forward, and they are not mutually supporting. They have the majority of their forces held back in a line along Column 2L. I am also surprised to see his 76* MTR sitting in an LOS shadow leaving Spotted Fire as his only option. One of the strongest positions he has set is revealed to be in 2M5 where he has his useful 51* MTR and a leader along with a Squad (who is used to dig a foxhole here later).
I don’t really think this setup will be able to hold me off. He has few units interdicting me as I move through the Open Ground and Brush strewn killing ground, and should I decide to forgo movement and just shoot for a turn I should be able to clear most of his forces away as I shall be in, or be easily able to move to, positions which offer me multiple attacks on the few targets available. Even if his plan is to let me onto the hill and just defend the valuable Lvl 3 crests this is going to work in my favour as the British setup almost instantly concedes the initiative to the German attackers and if I can take the first part of the hill with little loss then it will be easy enough to isolate or swarm his remaining units.
German Setup
I have heavily weighted my attack to the South of the hill. I want to try to get as much protection out of the Brush as possible (+0 TEM is better than -1FFMO). Also, if these units get close enough I can slide around the hill to attack from the flank or rear.
In the North I have some HS and a LMG stack, I want to get to the 2D4 building and from there they can help clear the Ridgeline. I have some HS to use up First Fire and limit his SFF opportunities.
I am keeping my 9-2 officer back with the MMG and a LMG, even though their attacks will often be at long-range I think that the fear factor of the -2 led MGs from the 3DD2 hill should keep his men back.
My spotter is HIP at 3W4, this give me some height although I don’t think I shall gain much value from this unit as the odds are not great.
Finally I have placed my MTR on the 3W7 Lvl 2 Hill to give him some oversight on the Southern part of the hill.
The Game
TURN 1
My first move of the game is to start to shut down some of his options with my MTR. I get only a single shot off thanks to no ROF but in doing so I am able to pop a SMOKE round right on the MMG stack at the very top of the first hill. My next shot is a long range attack with my MMG stack and this is able to KIA a 458 straight out thanks to a 1,1 DR. My moves begin with a level of conservatism but the conservatism stops with the British getting a few lucky hits and breaks which end up in the death of a 468. Otherwise my moves, especially in the South, are effective, I am able to spread out whilst also keeping FG cohesion to allow me possibilities of Defensive Fire should Chris not pull back.
The good luck for the British continues with a WP shot coming up trumps for them though I pass the WP NMC with nothing more than a Pin and a few re-DMed units to contend with. The reason for the spread out nature of Chris’ defence becomes clear as he starts to dig foxholes (2 successes from 8 attempts). He confines his men to movement away from the front lines as he tries to filter his units back to the Main Line of Defence but I am able to ELR break one of them thanks to my MMG having an 8FP -3 shot at him.
German Losses: 468
British Losses: 458

The Germans start to push on the Ridge with the main thrust hitting for the Southern side
TURN 2
The German Turn starts off with a huge slab of bad luck for the British. Firstly the 81mm MTR manages to not only break his 9-2 leader but it also the HS manning his MMG. Then the 5th 1,1 of the game is pulled out (3 to me, 2 to Chris) to wipe out a just-Rallied 458 and the 9-1 leader with him. Movement starts with my men sending patrols out to take away SFF opportunities which is helpful for me even though Chris decides not to First Fire at the sacrificial HS. Once I start to follow up with some serious manpower Chris rolls the 6th 1,1 of the game; this time in a MC for an 838 to make him Fanatic and create a Hero. My moves are mostly free of any major difficulties, Chris gets some good shots in but also rolls equally good MC results for my men. His Defensive Fire is against a mass of scattered men hugging the limited terrain so none of the easy shots he was hoping for originated. In return I am able to put together some nasty multi-hex Fire Group with the heroes and Assault Fire to spice it all up, more British are broken and I am only going to face limited harassment in the next Prep Fire Phase.
Luck is a part of this game, but to have 6x 1,1 results this far into it potentially unbalances the game right from the out-set and is not something I like to be giving or receiving.
The British start to open up all along the line and are targeting my well-spread Assault Engineers; I lose a HS and have an 838 and 468 broken in the Prep Fire Phase. The foxhole digging continues with one successfully being dug in the North of the hill (2L2). His men try to move forward to cover the ridgeline but they are going to have to move right into a mass of my Firepower if they do so thus they are waiting back for the Advance Phase. In Defensive Fire my men have very few targets to shoot at and this means that the MMG position on the crest line takes shot after shot until it fails a MC with a 6,6 to be CR. The other target (8-1, 2x 458, LMG in 2L7) manages to get off scot-free which is a bother as this stack is holding his flank from being turned. His men take a leaf form my book and spread themselves out whilst also covering the approaches as best they can, he has also set up some reverse slope defences on the vital first Ridge.
German Losses: 338
British Losses: 248, 458, 9-1, LMG
TURN 3-4
Truly, if it wasn’t for Bad Luck Chris would have no luck at all. His Rally Phase sees him fail to pick up the MMG abandoned when his men Routed and also sees 2 Rally Attempts with at least a 50% chance of success fail! During my Prep Fire things start to go a bit better for the beleaguered British; I get a lot of hits but almost all the MCs are passed with ease. My Movement Phase is started with the usual screen of HS advances; they are there to ruin his SFF chances as much as they are to absorb any First Fire if he is willing to throw at them. Unfortunately the dice now turn completely 180° and his men score KIA and 1MC a’plenty as my 8ML troopers fail MCs non-stop. About the only luck I have is that he does not hold back his fire and uses the majority of his shots before I move my higher value stacks and units later on but he still keeps back enough to KIA my 9-1 leader from a 2FP -3 long-range shot! The luck continues through till the end of the turn as I do so little damage to him that my attack at the bottom of the boards is actually stalled whilst my attack to the North of the ridge lines is gaining momentum thanks to the huge number of broken British units in this part of the map. However, this next British turn might end up deciding the game as a single turn of good attack results will be enough to smash my attack even though I am spread right out again. In Rout I am able to score a 458 death through the declaration of No Quarter.
The turn starts off painfully for me with a CR through a Fate 6,6 in Rally and then soon after a Fanatic 838 rallies with a 1,1 to create my 3rd Hero for the game! This is an indication of how crazy the DR have been for me with 4 MC or Rallies coming up 1,1! Once we hit Prep Fire there is yet ANOTHER 1,1 for one of my MC attempts; in the words of Chris (who is making most of these DRs for me) “This is getting ridiculous” – I now have my 4th Hero! His men pull back and with my multiple shots and the low TEM this means he is left battered and bruised even without the dice being overly biased (for once). We are managing to keep losses on a fairly even par and that means that the balance is swinging towards me. When we get to Advancing Fire Phase 1,1 again rears its ugly head to wipe out one of my Heroes.
Despite my men again failing to make much of an impact in Prep Fire I am able to strongly push right up to the first ridge and also take the base of the second. His few forces are overwhelmed totally, though again this has a lot to do with a consistently ineffective run of attack DRs. The problem is also that when Chris’ British do hit my men I tend to pass the MCs. When the dust settles he has a shattered force with almost no strength left outside of the rear-most ridge. The Germans on the other hand are spread out whilst also being able to mutually support each other; I even have enough spare troops to round up some of his brokies for easy Kills. In CC I am able to not only KIA one of the 3 units he has still in GO, but I also kill an 8-1 and embarrassingly score a 1,1 to kill off the Lt. MTRs 458 – this is so much true to the form of this game and I offer to end it here as there is not much more we can achieve like this. After Chris fails to recover any units in his Rally Phase he accepts my offer and surrenders.
German Losses: 248, 338, 468, 9-1, Hero
British Losses: 2x 248, 457, 3x 458, 8-1, 9-2

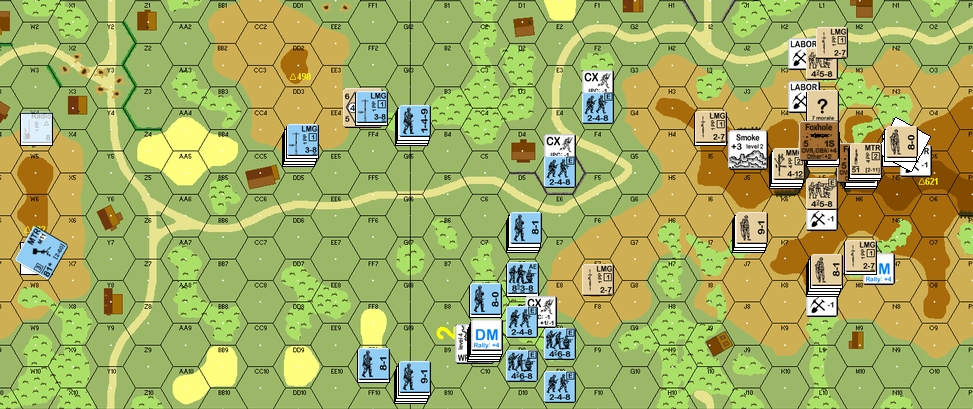
The situation at the time of the British Surrender
The British Surrender.
GERMAN VICTORY
Conclusion
Normally I don’t offer surrender for these games as it is more about the AAR than the ‘winner’. However, in this case all that could be learned from the game had come to the surface and it was such a total dicing that there was no point playing on to the bitter end (except, perhaps, to see if the Germans could put together a whole Squad worth of Heroes). From a dicing point of view this was obviously a disappointing game for the both of us though it is rare for me to not have stopped this game early and started something else – AARs are only of any value if they show some of the essence of the scenario. In this case I felt that it fulfilled the criteria.
The German attack, although blessed with mostly good luck, was able to use the limited terrain to the best advantage. I am not a player who uses SMOKE very much; I prefer to move fast and hit hard. While I know many would disagree with me I find that SMOKE ‘nades are a way to make an aggressive attack conservative and I generally only use them in city fights. The Germans were able to swamp the defence by spreading out and closing in. There ARE blind spots in the terrain and I feel that unless the British make their initial line of defence water-tight then those gaps can be (and in this game, were) exploited.
The British on the other hand would almost certainly re-assess their strategy for their initial defence after this game. The idea of a back line of foxholes is a good one and a vital one, but a few Squads digging was all that Chris needed, most of his men would have better served on the front line putting as much firepower into the initial German advances across the open terrain. Until the Germans get on the hill this game has potential to be a turkey shoot, with there being few options for returning fire. The British MUST make the Germans pay for every hex they take while still preparing for the inevitable breakthrough. Personally I would not have used the 76* MTR with a spotter either, that +2 for spotted fire often meant the difference between a hit and a miss. By placing only a few units forward the British ensure that the on-rushing horde of Germans can use their huge FP to pick off the limited numbers of defenders.
The Germans have a few options to hurt the British from afar. The MG stack with good leadership and the 81*MTR are both effective tools with great ROF chances, but they are generally going to be set back from the hill to keep them from being wiped out by massed British fire and then they run the risk of becoming irrelevant as the British are pushed back from the first hill. I don’t think the spotted 75* INF is any use except for some initial SMOKE. Perhaps the British might consider using a reverse-slope defence for both the front and back lines?
Both times I have played this game it has been one-sided, though the first time it was me who lost and I took the Germans then too, although I cant remember for sure how it happened! Despite these experiences I would not really hesitate to give it another try, it is an interesting little scenario with some tricky problems for both the Germans and the British.