RILEY’S ROAD CG
19PM
Legion defending as the Germans
ROAR (C:G – 5:9) – 5th April, 2007
Played with Live VASL (5 sessions: 21 hours)
The 19AM game was finished and we both had a lot to be happy about (I kept control of 9LVP, he took and linked half the map) and unhappy about (I lost 3 of my AA, he lost 6 Squads). We are now faced with the prospect of another game with the Canadians in the attack and the with on-board Germans at great risk of being swamped.
I have a clear idea of what I want from this game though. I want to kill Canadians and I want to preserve some of my forces for the next game (which will be night) – if I can keep all of my reinforcements from this game and the next then I shall have a maximum of 160CPP available against his maximum of 65CPP! And this will be for a Night game when his AFV are off-map!
German Forces
I chose an Idle Chit, JP decided to attack (as well he should!)
On-Map Forces
12x 548
7-0, 8-0, 8-1, 9-1, 10-2
5x 228
5x LMG, 2x MMG, HMG
PSK
88LL PaK43
Unit A Remnants
12x 548 (40% Casualties)
Purchases
With 80CPP to start with I made the roll and got a lucky 6, this means I have 74CPP with which to buy my forces. As my plan is to NOT attack this turn, maybe just to make my presence felt on the map a little and to possibly hit any under-guarded areas I bought with the idea of my counter-attack in the 19N game.
Unit Designation / Type (Remaining) / Units / Cost
B (I1) Para Inf. Coy (3) 10x 548, 3x LMG, 1x PSK, 9-1, 8-0 28
C (I3) PzGr Coy (2) 10x 467, 3x SPW 251/1, 3x LMG, 8-1, 8-0 25
V6 SPAA Sect (Lehr) 2x FlakPz IV/20 8
O2 Heavy MTR (2) 120mm OBA + 2 Pre-reg 10
M1 2x Fortifications (14) 30FPP (12x Foxholes (12), HIP (2), 17x ? (16)) 2
= 73
This gives me a potent-enough force to attack in strength should I notice any weaknesses in his line. I also have the option to bring the devastating FP of the FlaKPz IV/20 on-board (after Turn 4 due to it being a Lehr unit) to slaughter any units which are not in cover. Unfortunately I have again done poorly with my leader rolls but I have decided to try and get as many leaders off-board from the initial complement and I really didn’t expect any of them to survive the first game, so that will be a small bonus.
I took a bit of a gamble with the Heavy MTR, it a cheap and powerful attack option, but I run the risk of getting swamped by his numerical advantage and thus not getting my full worth from this unit. However, he is likely to attack the Milk Factory in force and I can use the 24FP OBA to smash his massed units. I have bought 2 pre-reg hexes, this is for the Black Chit bonus and for the ability to get some of this lovely OBA on-map ASAP and on-target.
My pre-reg locations are U12 and U17 with the Field Phone in E14 (line running to edge of board and then off South edge) – he has to try and take the Milk Factory and these locations are the likely jump-off and support points.
German Attack Chits: 6
Canadian Attack Chits: 1
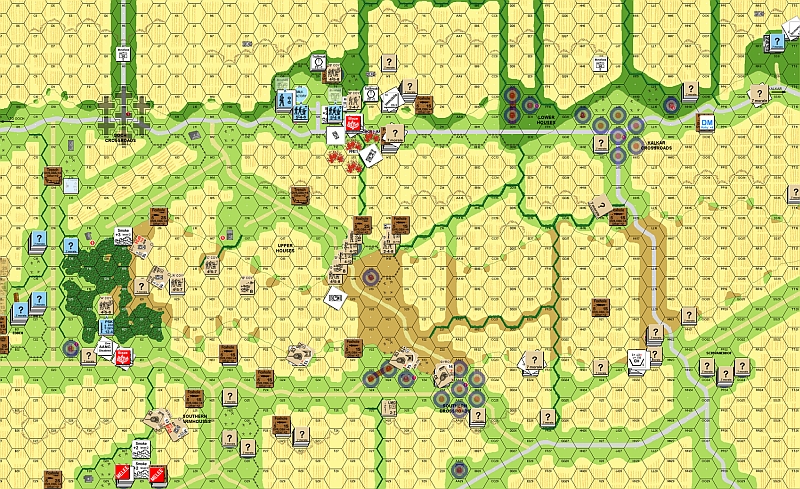
German Setup
I have decided to fight it out in the Milk Factory and have thus written off these forces.
Ebban Area
A18-22 1S Foxhole
B20 3x 548, 2x LMG, 9-1
C17 3x 228, 2x MMG, HMG, 10-2
C20 3x LMG 548, 9-1
F16(c) 548
G21 PSK 228 HIP
H17 4x Dummy
J16 4x Dummy
I have made this my ‘last-stand’ area, though the foxholes are there to allow me to escape if the pressure becomes too great… I do NOT want to lose any of these units. Also, after this game I can pay just 2CPP and enter from here so if I can hold any of this terrain then I can also easily reinforce and exploit it next game when I have the advantage.
I have placed the HIP PSK 228 with a view to scoring a shot on an AFV if he decides to lead with them as he has been all CG… even better if he uses a Wasp to lead the attack which is another tactic he used all through the Initial Scenario. JP is a Obsessive Searcher though so I don’t hold much chance of his making a successful ambush.
Goch Crossroads Area
F14 Field Phone 7-0 HIP
L11 3x Dummy
This leader is sacrificial and he will be calling down OBA until he is over-run, if I double red-chit then he will run for it, otherwise he will stay till the end. Unlike other CGs there is no chance for ‘promotions’ apart from the HOB mechanism, so there is little need for me to be overly careful with preserving 7-0 leaders when I shall be getting more of them later.
Milk Factory Area
Q9 2AT Mines
Q10 88LL Pak 43 228 HIP
548, 8-0
S8 2AT Mines, 6AP Mines
R10 2x 548
T8 3x Dummy 1S Foxhole
T10(C) 2x 548
U10 2AT Mines
V9 2AT Mines
I have not changed the location of the AT Gun because he will not expect that… but as it stands this is a great position for it anyway; I can cover the R10 Factory hex and the approaches to the Gun itself. I have 5x 548 and an 8-0 and I fully expect to lose them all during this battle, I just hope that the dice-gods smile more favourably upon me than they did in the last Game so I can take down enough me with me when I go!
My OBA Pre-Reg locations are to protect the Factory from approaching troops (U12) and to hit the locations where he is likely to have supporting fire, AFV and OBA Observers (U17)
I can show the mines here now as they were revealed at the end of this game
Kalkar Crossroads Area
SS7 LMG (b), 228 Fortified
I will run if I can, but otherwise I shall try and hold this terrain… even if I can score just a CR in CC I shall be happy. I don’t hold out much hope for the survival of this unit.
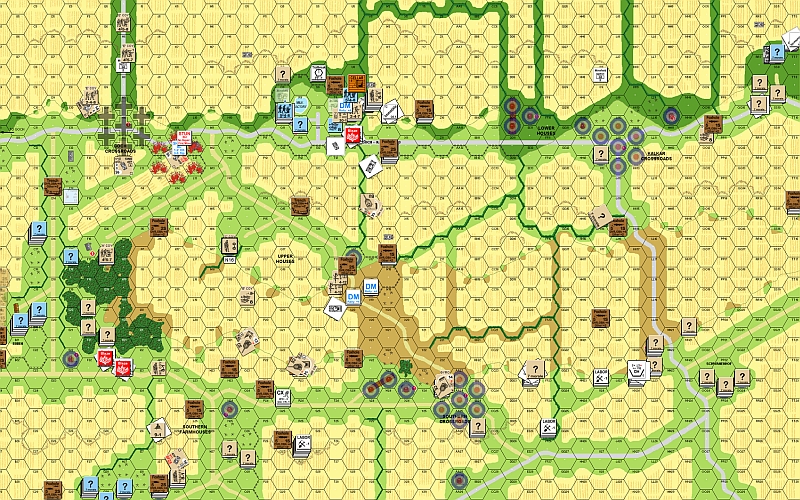
THE GAME
TURN 1-2
The Canadians are not attacking the Milk Factory with anywhere near the force I thought they would. They are obviously keeping men back to guard possible places where I might counter-attack, and the rest of their men are attacking towards Ebben from the Southern Farmhouses and Upper Houses area. He has bought OBA with a field phone and this guy tries to drop it on the Milk Factory but thankfully misses. He also uses his Shermans to try and WP and SMOKE my visible units (the majority of which are dummies) but a lot of them fail and he even scores a MA Malfunction. His only success is a the removal of some dummies on the Ebben tree line.
The Canadians are very cautious in their attack and I wonder if he fears me buying AT Guns. My dummies are doing their job well and keeping him moving slowly. Interestingly when JP does send a unit forward (a HS and Carrier) he fails to be his usual paranoid self and completely misses the PSK 228 lurking HIP in the Southern Ebben tree line… this guy just waits, there is a Carrier sitting right next to me, but I would rather wait for the AFV that is sure to follow. His Fireflies are being placed Hull down on the hill crest lines facing the Southern edge. A few units are probing towards the Milk Factory, but nowhere near as many as I expected. My Defensive Fire calls down 120mm OBA on a probable location for his 100mm OBA field-phone and though I miss the OBA leader it is off-target in such a way that it lands right on this MMG nest and an adjacent AFV – though they suffer no damage except an Immobilisation for the Sherman.
My Turn 1 brings little except for the continuation of the OBA – and this time I score better… I break a 458 manning one of the MMG and kill a Sherman III… great stuff! He attacks and misses with all his shots and my 88LL in the factory is trading shots with the MMG nest, neither of us are getting any results.
With Prep Fire comes some more effective Canadian OBA and as luck would have it they manage to drop the OBA off target and hit the 88LL Pinning the crew. He now pulls men from the Upper Houses area into the attack on the Milk Factory but with the minefield and the terrain as well as the blocking force in the T10 Cellar it is not as easy as it looks. He sends a Wasp in there but this guy gets too close (mostly thanks to his own use of SMOKE) and suffers a stun result… Poor JP is not aware that he is also placing units all around my other Pre-Reg hex for the OBA and with a FFE:C onboard I shall be switching my fire immediately. In the Ebben area he uses a HS to take the E22 location, but he is cut down to size as I open fire with 2x 20FP stacks (I needed two shots as the first one was a 6,6 which malfunctioned a LMG); when this guy Routs he bumps into my HIP PSK 228… but by this time JP had conveniently parked a Sherman 2 hexes away so I revealed myself, declared No Quarter, and killed the HS for FTR. He has not pushed in on my lone LMG(b) 228 in SS7, he has only sent a Sherman across there, but this might be partially due to the massive involvement of my sniper who has been quite active in the North East.
At last we come to the OBA and I score a mission and roll for accuracy… and miss… sigh… It hits a bunch of concealed units, only breaking 1 of the 4 MMC it hit… BUT it also cut the lines of his field phone and his most worrisome 100mm OBA is gone! I could not be any happier. Shots are traded back and forth, but the nature of the battle is such that neither of us have many targets available. In the Southern Houses area he claimed the southern-most buildings and foxholes, but to do so he has to sit in position and this means I can Advance units from off-board in the next Advance Phase straight into Close Combat. A single Engineer HS with a DC has managed to enter the T10 building of the Milk Factory, but I am sure he wont last too long.
My Turn 2. I correct the OBA and this time it falls right on target and that target is a mass of men and Carriers… the devastation is terrible. His Milk Factory attacking force is cut to pieces and I even kill a Wasp! He has an 8-0 leader ELRed and Wounded and a 458 is ELRed also. This attack was noteworthy in that I rolled a 6,6 for a 24 FP shot and still managed to cause a break! I have never broken a unit from a 6,6 on an attack roll before. My PSK totting Crew in the Ebben region also manages to kill his target, a Sherman V(a) but is pinned so he cannot try to CC the Carrier sitting Adjacent to him. I have no other attacks and I have no moves either… he has to come to me and he has suffered mightily before even starting his attack. To make matters worse he also gets a 6,6 and malfunctions his 70mm OBA Radio though it will be available to him next game.
In the Advance Phase I bring on 3x 467 , 8-1 to CC a CX 458… there is no ambush and I completely fail to kill him from a 3:1 attack. Then a 548 attacks a 228 in CC after Advancing from off-board and he too also fails to get either an Ambush or a kill… what a disaster. At least I am able to eliminate the 248 Engineer in the T10 building.
German Losses: 13x dummies
Canadian Losses: 2x 247, 248, 248(e)
Carrier A, Sherman III(a), Sherman V(a), Wasp
The Canadians are forced to dilute their attacks on Ebben and the Milk Factory due to the possibility of a German Counter-Attack
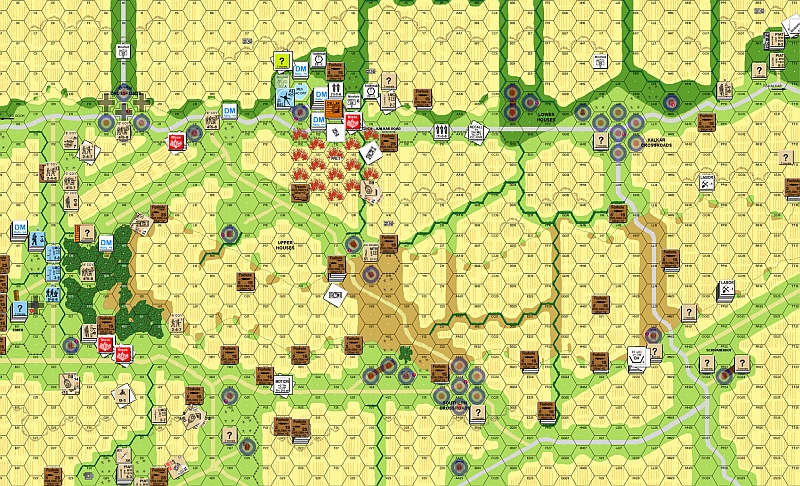
TURN 3
JP starts the Turn with some very poor rally rolls and then caps it off with his Malfunctioned Radio being eliminated on a Repair roll – this is a bonus as I am sure it was meant to be used on the Ebben attack, the only negative is that he will get it for free in the next game as it did not fire a shot. In his Prep Fire all of a sudden the dice change their tune and the high DRs are replaced with his usual jaggy run of impossibly low attack DRs; only the excellent TEM of my positions saves me as he hits the Milk Factory with shot after shot and my 8ML troops go back to their usual way of non-stop failing MCs when they should be passing at least 64% of them; I roll 4x 9’s in a row, and suffer break after break, including the vital crew on the 88LL AT Gun!
Thanks to my 88LL being out-of-action JP brings on his reinforcements down the Northern-edge to Goch Crossroads road. They are able to waltz along unmolested and I must admit that this is a good little attack, it cuts off my Rout paths, allows him to take the Goch Crossroads with little threat to himself and will also shorten the lifespan of my OBA Observer. His Wasps get into the action now and they also benefit from his crazy dice (lots of 3’s, 4’s and 5’s) as he attack the Melee containing a solitary Canadian 458 and 3x German 467 with an 8-1; HIS 458 passes the 3MC… all mine fail including a CR ELR break from a 6,6 result. You have to remember that last turn I attacked this location in CC with 3:1 odds and a -1drm and failed to get the kill. This trend continues for the rest of his turn as the few times my limited forces manage to score a hit he passes the MC, while his men managed to hit over 50% of the time (usually against +3 TEM with 6FP average) and didn’t fail a single MC. At least my cheeky little PSK 228 unit (G21) is able to kill the Carrier sitting next to him, though he pays for this in CC with his life.
Rain Starts.
My OBA is corrected from the SR I placed last turn as I wanted to have the chance to hit a Wasp which had moved over to the Goch Crossroads area… and thankfully the OBA fell on-target for once! The 24FP attack stuns and Shocks the little AFV as well as ELRing the crew, but fails to kill it outright. Still, no complaints about that, I am happy with this result as I have a damn good chance of killing my second Wasp this game which would be a huge result for me. As soon as that is resolved I rotate the AT Guns CA (the Crew managed to rally this turn) to bring his MG nest in the Upper Houses area (T18) into my cross-hairs… this Gun goes on a ROF tear as the dice attempt to make up for the terrible way they have treated me this game… but the time it is finished his 10-3 officer is ELR Wounded and 1.5 Squads are KIA leaving this MG nest devoid of unbroken troops; this is a HUGE result that might have a long-lasting effect on the Milk Factory battle.
My Men in the Milk Factory’s T10 building attempt to place a captured British DC on an Adjacent unit but JP opens up with absolutely everything he has as he battles my TEM and the suddenly poor dice; he hits eventually and my MC result shows that nothing has changed there, the NMC is failed with ease. Still this has been an excellent end to what started out being a terrible turn. I have broken a number of units and managed to hold him away from the locations I am attempting to defend. The loss of 2x AFV in the Ebben attack as well as the 70mm OBA which was to support that attack has really put a dampener on his plans for this area and I would be surprised to see if he is willing to push on into the face of 6x 548 and 5x LMG!
As a measure of how bad this Turn 3 has been for me; I took 16MC (the majority of them NMC) with my 8ML units… I passed just 4 of those MC and 2 of those were Pin results!
German Losses: 467, 548
Canadian Losses: 228, 247, 248, 458
Carrier C
A flurry of foxhole digging expands the Allied perimeter while reinforcements arrive to attack the Goch Crossroads area.
The Milk Factory is currently holding out, but a Counter-attack into the Southern Farmhouse area hit terrible luck and suffered disproportionate losses.
TURN 4
Hmmm… His just ELRed and Wounded 10-2 officers gets a HOB result from rally to make him a Wounded 10-3 Hero… sigh…
JP had snuck some men up the hill near the Milk Factory and this allowed them to fire with a 16FP+3 shot which has naturally caused the 228 manning the 88LL to break again (he has taken 1x PTC and 2x MC and failed all of them) though the rest pass for a pleasant surprise. From this pass comes an unpleasant surprise when a SAN result hits a stack of 4 units in the Ebben area… and that SAN just HAS to hit the leader! My 8-1 dies but since there are no units able to threaten me I attack the SAN back for a KIA result making him a 2 SAN now. Down in the Southern Farmhouses area he fires with his never-missing FT and despite it being a 6FP +1 shot I suffer a NMC and again have all the units in this hex broken, including an ELR CR off of another 6,6 result – he then fires with an 8FP +3 shot and again causes a NMC which both my remaining units fail.
Movement is to AM into the Milk Factory’s T10 location (my own 8FP +3 shot misses by miles) which ends up gaining 2x 548 for him as prisoners. He also starts pulling units away from the Southern edges to come towards the South-Western battles… does this provide me with a chance to counter-attack now his defensive lines are thinning? Apart from the devastation wrought in the Southern Farmhouses area this Movement Phase is really just about him dressing his lines. He is attacking towards the SS7 house too, and my LMG(b) 228 is powerless to stop him.
Again my 88LL Crew rallies immediately, which is more than I can say for my 8-0 here who has not rallied for 2 turns now. In Prep I take a punt with an LMG attack on his WASP (going for the TK) and score a CH! Wow… how cool is that! A 64% chance of Elimination or Shock / Immobilisation – until I roll the dice and fail miserably… sigh… I then decide to fire my AT Gun and 3x 548 on a stack of 3 Squads and a leader standing out in the open, the odds of success are high – for anyone except me – this is also an abject failure and JP manages to get away scot-free from yet another potential disaster. In fact, there is NOTHING that worked for me this turn as shooting, MC and statistical probability fail completely.
When it comes to his turn to attack back all of a sudden the dice decide that they can dip below the number ‘6’ again and he cuts through my men like a chainsaw through butter. I suffer multiple breaks on both sides of the board and the Milk Factory is in real danger now as 2 turns of horror results have weakened the defence to a huge degree.
Turn 4 continued the terrible MC results; I took 14MC (the majority of them NMC) with my 8ML units… I passed just 3 of those MC and 2 of those with 1x Pin and 1x 6,6.
German Losses: 2x 467, 8-1 (2x 548 Surrender)
Canadian Losses: 247
Wasp
SAN -1

The Milk Factory defence is starting to be overwhelmed as are the reinforcements in the Southern houses area.
TURN 5
JP has been digging so many foxholes this Game that I wonder if he is looking for the ‘Lost Ark’ or something. It is excellent tactics for such a difficult CG and it will allow him all-back positions and lines of control should I manage to successfully counter-attack anywhere.
His Prep is the same-ol, same-ol run of ridiculously low attack DR but for once I pass almost all the MC. I also get a SAN result which hits a CE Sherman V(a) and forces a Recall!
In movement he is able to find my observer but fails the TC for an Infantry Overrun and then proceed to lose 1.5 Squads (+ some ELR results) as he tries to kill my man before the Defensive Fire Phase – this he fails to do and I am able to call down one last OBA mission (Harassing Fire on the U12 pre-reg) before being eliminated in CC. In the Milk Factory attack he finally gets gutsy and takes a risk, my initial shot was a cowering miss, so when he moved adjacent I took the FPF shot… naturally this is the usual crap and I am broken from my own attack – I have not succeeded with a FPF shot for as far back as I can remember! The Canadian tide swings in to surround the Milk Factory meaning retreat is no longer an option; though I am able to score a few hits and break a few of his audacious attackers. [Still, with JPs reliably incredible runs of luck I often wonder why he doesn’t ride it and push much harder in these sorts of games. He often sits back and punishes me completely but then rarely gets the massive breakthrough required to clean me up completely].
Things are grim in the Milk Factory and in the Southern Houses area. I withdraw my men in the South and surprisingly only lose a HS to the board exit-rolls. In the Milk Factory I open up with my 88LL against an adjacent stack (8-1, LMG 458) and scores a CH! That CH then rips apart the 8-1 leader with a 6,6 and JUST breaks the 458. I decide to IF (I would rather lose the Gun than let him have it) but miss (needed an ‘8’, roll a ‘9’). My 548 also fires and also damages a stack out in the open, this attack of his has been severely halted by just 2 defensive shots following regular statistical probability.
My only move this turn is to get the 10-2, 3x 228, 2x, MMG, HMG out of harms way. To do this I need only brave a 2FP +0 shot (he misses) and a 7MTH +1 HE shot from his I16 Firefly – this shot hits with an ROF 4 and I face a NMC… the 10-2 leader is Pinned (well, wouldn’t that be just about right) and one of the 228 breaks… he fires again and whips out ANOTHER 4… for another hit which breaks another 228 – this is totally ridiculous. Thanks to the loss of this vital stack I am forced to move my men in the Ebben area to provide some coverage for the leader and the decimated stack and I would also like to dig some foxholes in this area to consolidate my hold here.
German Losses: 247, 2x 548
7-0, 8-0
Canadian Losses: 247, 248, 8-1 (2x Dummies)
Sherman V(a) (recalled)
Finally the Milk Factory Defenders get a run of luck that holds off the Canadian attack.
The Allies are unwilling to push in on the Ebben area though.
TURN 6
Well, it wouldn’t be one of my turns unless I rolled a 6,6 for a MC and this one comes during Rally. My 10-2 with the 2x 228 loses one of the 228 through this. Then JP opens up with his nearby Firefly and scores his 3rd 4 attack DR in a row with this AFV vs this stack, the result of the attack is a 3MC and while JPs 8ML units have passed these with alarming regularity this game my 10-2 leader cannot, he is wounded and dies from those wounds, the 228 with him dies also. I am totally disgusted with this but there is little I can do about it.
JP attacks into the Milk Factory (the site of the only action this turn) and surrounds me with a ring of forces – his attack is not without loss though as a surprising number of his troops are broken and ELRed. The ELR results will be telling as units do not Battle Harden in this CG except through the elimination of a Hero in refit or through HOB. So, even though I have not killed as many of his men as I would have liked this game I have weakened him with every ELR fail he makes. JP also tried to sneak a Sherman past the Milk Factory’s AT Gun but that didn’t go well for him as the AFV is eliminated from a lovely hull side shot. In the end although about 4 Squads attack the Milk Factory last-stand location only a single MMC is able to close in CC and that ends up as H-2-H CC which eliminates my 88LL crew and results in Melee.
Apart from the CC in the Milk Factory the rest of my men are in Ebben. I use them to dig foxholes… but I make 5 attempts for no success – is there any better way to show the differences in DRs made this game, about 50% of JPs foxholes succeed first time! No shots are taken, no moves are made and in the CC Phase the Milk Factory CC sees him take a CR while I escape loss.
And then… JP rolls a ‘1’ and the game ends!
We have to fight out the Milk Factory CC and I kill his HS there and release the HS prisoners he had taken. Through some crazy turn of events I have managed to hold onto 1 Milk Factory location!
German Losses: 3x 228
10-2
Canadian Losses: 458
Sherman III(a)
The Butcher’s Bill
German Losses
3x 228, 1x 247, 1x 248, 3x 467, 3x 548 (248,2x 548 Captured) (9.5 MMC lost)
7-0, 8-0, 8-1, 10-2
1x PSK
Post Game
HS prisoner released -> 236
Canadian Losses
1x 228, 1x 247, 2x 248 (1x Engineer), 2x 457, 3x 458 (6.5 MMC lost)
8-1, 10-2
1x Carrier A, 1x Carrier C
2x Wasp
2x Sherman III(a), 2x Sherman V(a)
(all AFV lost with Crew)
Post Game
Escape Losses: 2x 457 ->2x 447
Wounded 10-3 eliminated.
PSK retained.
Gains 5x LMG from Scrounging
Canadian LVP Gained: 17 (28)
German to Canadian MMC Death Ratio: 18 : 18.5
The Canadians were forced to hold troops back to deal with the possibility of a German Counter-attack, however they were not idle as they dug very many foxholes to link up their Control Zones
In terms of force remnants we have both maintained a rough parity with each other, though obviously JP paid a high price through lost AFV (Tanks must be removed from the board where possible for the Night games). He did gain the 2x AT Guns
Map at game end with Control Zones marked out.
Blue – German
Brown – Canadian
Red – No-Man’s Land
End of Game Forces
German
236, 247, 6x 467, 17x 548
3x 8-0, 2x 9-1
228
LMG(b)
11x LMG, 2x MMG, HMG
PSK
88LL PaK43
3x SPW 251/1
2x FlaKPz IV/20
Canadian
237, 247, 248, 7x 447, 11x 457, 18x 458 (2x Engineer)
2x 7-0, 4x 8-0, 5x 8-1, 9-1
5x 228
20x LMG, 4x MMG
9x PIAT
4x 51mm MTR
2x DC
PSK
2x 57L AT
1x Carrier A
1x Wasp
9-1AL
2x Sherman IIC(a) (1x Immobilised)
2x Sherman III(a)
1x Sherman V(a)
2x Sherman VC(a)
70mm OBA
Conclusions
My initial Response was that this was a disaster, but in looking over the numbers at the end of the game I can see that this is an exaggeration brought about by the terrors of the last turns. I have nearly doubled my available force of infantry and although I have lost my best leader and a smattering of others I have maintained a parity in numbers. I have more LMG available and also have kept the AT Gun with which I hope to be able to do some damage in the first turn of the next game. In keeping this gun and some units with it I am also going to force him to hold men back to deal with this threat which will draw units away from the front-line; though if he is smart he will use it as a chance to drop the No Move penalties.
His losses were not insignificant. Losing the 2x Wasp and 2x Carriers is almost 15CPP he has to make up if he wants to return to his start-up force and this game alone he lost 3x AFV (almost 14CPP). Also, despite the near 2:1 loss count in his favour it is still 1:1 for the CG and his reinforcement barrel is almost scrapped to the bottom now. Another good sign was the retention of the 3 LVP which stopped him owning the board. He is happy with this, but I think he assumes that he can hold the rest of the map with ease despite my attacks – even if I only take 1.5 LVP off of him a game I am still going to stop him winning the CG.
Without a doubt this was another heavily biased game as far as the dice went…
– My Reinforcements were brought on with an almost statistical impossibility for failure, and yet they failed. In the end I lost 6 CVP for just 2 CVP of his non-crew units as almost every single DR of mine was a failure and almost every single DR of his was a hit or CC kill. These units should have jumped on, achieved a CC kill (with 80% chance of success) and then left the board unmolested, instead I took terrible loses. In part this is because I reinforced my original failure.
– In Turn 3 I passed just 4 of my 16 MCs (with 2x Pin results, 1x 6,6).
– In Turn 4 I passed 3 of my 14 MC (1x Pin, 1x 6,6).
– My 10-2 leader took just 3 MC for the whole game… 2x NMC (Pinned) and a 3MC to be wounded and killed… I have not played a game this year where a 10ML officer has passed more than 1 MC out of 3.
– As usual the huge number of low attack DR by JP was far beyond what can be expected, and when he missed it was usually against single units, when he hit it was against important stacks (Turn 5 was a great example when he scragged a 1MC result from a 12FP +5 shot). His ability to pass 2MC and 3MC with ease is baffling.
For me there were some positives though…
– He malfunctioned and repair-eliminated his 70mm OBA without firing a shot and this coupled with the loss of 2x AFV almost certainly put a hold on an attack into the Ebben area.
– My OBA scored exceptionally well and also managed to cut his 100mm OBA field-phone line. This buy was the absolute highlight of the game for me as the OBA gained many kills and also blocked his attack into the Milk Factory.
– I had a huge number of active SAN results (10 from 23 attempts) but this also goes to show just how many 4’s he rolled… there was really not that much shooting in this CG due to my limited numbers of men, and yet he still managed to roll 4 so many times!
– Finally, and most importantly; the game ended at the first opportunity. Although the Ebben area was fairly safe this result has made a major difference to the LVP tally since I was able to win the CC and hold a solitary hex in the Milk Factory. For someone who is soon to be outnumbered and defending against attacks from anywhere on his extended perimeter this is a bit of a blow to the Canadian Commander.
Again I will have to say that this was a drawn result… perhaps slightly in his favour as he was able to link together his control zones and also kill more men than I did. However his loses will take the shine off of the game for him as will his lack of aggressive attacking to totally own the board. I think he will look back on these initial 2 games and accept that he has not attacked with the aggression needed (as he usually does). The most-excellent Article in ASL Journal 5 suggests that the Canadians should take 14 LVP by the end of the first game and then own the map (20 LVP) by the second… and even then the Germans need only take 3 LVP a game to win the CG; JP took 11 LVP in the first and 17 LVP in the second which puts him roughly 2 games behind this ‘schedule’.
Quite rightly JP is looking forward to the Night game as he wants to catch my men as they cross the open terrain in front of his prepared positions, this will all come down to the IR results and it should be a fascinating tussle.