PEGASUS BRIDGE
CG I
JP playing BRITISH
NIGHT 1
THE PLAN
Having surrendered on the previous game without him firing a shot because my glider rolled a “6” on its crash dr and the subsequent CR result killed my 9-2 leader and CRed a 648 with the other 648 and the 248 HS both failing the NMC AND THEN both 648 failed the LLMC (+2) so my force had lost its best leader and 1mmc as well as having 3x HS broken and 2 LMG and 1 PIAT suffering a breakdown I was somewhat apprehensive about the landings on this game turn. (I fail to see why an historical scenario like this one would have a random chance of starting with fewer troops!!! Why don’t we both just randomly pick a few counters out of the box and play with them?????) [Legion says: I agree, this is a strange way to start, though at least a restart at this point is easy]
My strategy for this game was unchanged; land adjacent to the enemy AT-gun, and Pillbox, and fire in advance fire phase, then follow up with a close combat attack if needed. I had packed my first glider with 2x 648, the 248 HS, the 9-2 and 8-0 leader 2x LMG and 1 PIAT. They were to land at Y21, shoot at the occupants of the building Z20 and, while the HS and 8-0 advanced into CC vs the AT-gun crew in X20 the remainder were to advance onto the bridge and set up a base of fire so that the following troops could cross the bridge in safety and clean up the rest of the enemy on the west side of the bridge. Once across, the 9-2 and his escorting 648 LMG and PIAT were to advance down the road Y19 to KK18 and hopefully kill a squad or AFV lurking in the town of LE PORT. I was well aware that he could have HIPs in the (currently empty) building JJ16 but decided that it was worth the risk as game two is a very close run affair and any chance to lop off an AFV should be taken.
TURN 1
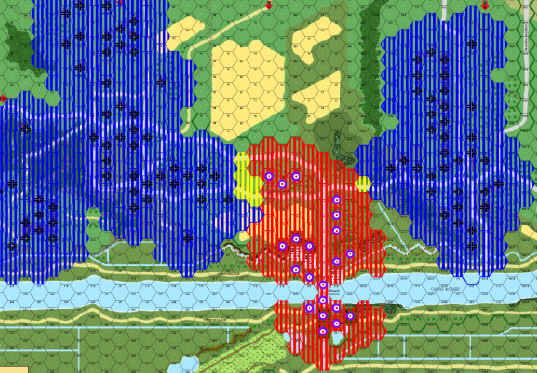
This time my landings were successful, in Y21 I had 9-2, 8-0, 2x 648, a 248, 2x LMG and one PIAT. Y22 landed with 8-0, 2x 458, and a 248 with the balance of my force being an 8-1, 648, 458, 248, 2x PIAT and a 51mm MTR landing in AA21. There was no defensive fire due to the TPBF ONLY rule, so we skipped ahead to my advance fire phase.
My fire achieved a MC result on the building Z20 and his “stack” was exposed as dummy counters, so far, so good. In advance phase my main fire group (the 9-2 etc.) advanced onto the bridge (Y20) while a HS and 8-0 CCed the AT-crew. Meanwhile my 3 458 and 8-1 leader CCed the pillbox. The crew was killed for no loss and the pillbox turned out to be more dummy counters. Although at this point I knew that there were 5 squads on the opposite side of the bridge (2 of them HIP) I was still confident. In his turn 1 his troops sat and waited, I fired my main FG at the Café Gondree X18 (it was deserted, an obvious place for a HIP!) but rolled an eleven so no result.
TURN 2
In my PREP FIRE my 9-2 FG fired at the Café Gondree again, this time with a result!! The HIP conscript inside the café failed ELR and was disrupted. (Too obvious!! Nobody would leave the only building that can get PBF on the bridge exit unoccupied.)
During my movement phase I ran a 458 across the bridge to Y19 where his 436 in the Café Picot (Z17) fired with no result. Then things became a little unglued, I ran another 458 to Y19 and the 2FP residual caused a MC which the unit passed but was pinned, likewise the next 458 also was pinned in the residual, with that hex now possessing 3 squads and the 8-1 leader I was unable to get any other MMC across the bridge (and, in fact, only able to advance a 458 and the 8-1 off of the bridge into X18 in the advance phase!) a bottle neck had appeared!
His disrupted 436 in X18 surrendered in the rout phase and during advance I moved the mobile 458, his prisoners and the 8-1 into X18. Thankfully he did not have freedom of movement or he could have had a turkey shoot!
In his turn 2 the 436 in Z17 started moving away and I was unable to get LOS so no return fire from me. Meanwhile his Kfz 1 moved into LE PORT.
TURN 3
X18 fired at W18 looking for t he last HIP but it was a no result, the rest of the troops started flooding across the bridge and into the town, we were not fired upon and at the end of the turn I had my 9-2 FG in BB17 (they went CX) and the rest of the force in and around Z16. I was able to make one conscript ELR during advance fire.
During his turn 3 movement (his entire force had freedom of movement by now) I successfully ELR’ed another one of his 436 (3 down 2 to go!) the last HIP was exposed as it ran away from the trenches in X16 and his Kfz 1 with passengers moved across the board into V13 still in motion. That surprised me!!!
TURN 4
I now had a great chance to kill the Kfz by running 2x 458 and the 8-1 Ldr up the road Y17 – Y14 and then I moved my 9-2 FG (by this time it was 3x 648 strong) along the road BB17 to II18 where they were fired upon by a 447 and MMG (they were HIP in JJ16 the fire resulted in a pin result for one of the MMC but, it worried me, they were in the open and I didn’t want them to break and be CCed by one of his MMC so, during advance phase I split the force into two parts, that way if he broke one in prep fire the other could give covering fire to anybody trying to get close enough to CC). I also advanced the 2x 458 and 8-1 into X13 – only 2 away from the Kfz a stroke of genius on my part!! The rest of the force concentrated on taking the remainder of the buildings, capturing the disrupted 436s and the trench network.
During his turn 4 he kept running away and was able to get a 436 into the village of LE PORT. The 447 and MMG Assault Moved into JJ15, which I assumed, would now be 2x 447 and a MMG there. I was happy he didn’t fire at my 9-2 FG but knew I could not risk advancing into that sort of point blank fire even with a +3 stone building advantage. His Kfz tried to escape but my 8-1 and 2x 458 in X13 fired and killed the toy car, his passengers failed the survival DR so a 238 SS HS and the 8-1 Ldr were all killed too. (There was a bit of bother with this as my HS fired an IR which successfully illuminated the Kfz, unfortunately, they were guarding prisoners at the time and were unable to do so, however, on rechecking the result against the Kfz it was still a kill. What can I say? I had a personal Heat-of-battle/berserk kind of moment.)
TURN 5
I had finished taking the village and was now trying to kill the last available 436 and 8-0 Ldr that were running away from X15 through the wheat fields towards Benouville and, although I was able to fire at them I was unable to score a MC or better. I also needed to take the Schoolhouse buildings (V12) to set up for the next game, and I moved some MMC into BB13 and BB15 in order to dig foxholes and thereby extend the depth of my defence for the next turn as well as forcing his units to start in the village (LE PORT) rather than in the forest.
In his turn he kept running.
TURN 6
I was unsuccessful in digging the foxholes and was unable to catch his retreating 436 and 8-0 leader so I concentrated on taking the rest of the Schoolhouse area in preparation for game 2.
In his turn, he kept running and was successful in his game end dr so the game ended there.
POSTMORTEM
I was disappointed that 2x 436 and the 8-0 were able to escape, but was very happy with killing the Kfz and attendant SS HS and 8-1 leader so I feel that it was a fair trade in the end. (Last time we played this game his Kfz exposed my AT mines dug into the dirt road at CC18 and survived!) So, at least this time it will be an AFV that finds the AT mines so, I am happy about that.
As for the force in Benouville, well, they still need to take the buildings Z13 – Z17 and, if they want to crawl through the wheat and then run across the road at my force, then they are welcome to try.
In retrospect, I probably wasted the best part of my force (the 9-2 and 3 648’s) trying to attack Le Port, they could have done more good killing his escaping conscripts, thus freeing a 458 or two to dig foxholes in DD13 and GG16 which would have seriously hampered his set-up and allowed me to have a defence in depth rather than the “stand and fight” that I will probably have to do next turn.
Overall, I am pleased with the game result, but I know Legion well enough to know that he has something up his sleeve (we have been playing for ten years now, and, although he is as wily as a fox with a degree in sly from the university of deception he also takes it far too seriously to be healthy for him, all I need to do is surprise him with an ambush or two and his personal morale crashes and he starts playing badly – a 1,1 result for me or a 6,6 for him usually also does it!!)