RED BARRICADES
CG III – THE BARRIKADY
18 October
JP defending as the Russians
BUYS
Having had a good look at the map and placing my fingertips where I thought I needed troops I soon realised that I needed more fingers and, sadly, more troops. Realising that my -1DRM was going to be lost at the end of this turn I decided to buy the maximum 3 companies and an AT platoon, this will give me a +1 in the ELR DR but I will have to take the chance. I was going to buy dug-in tanks to ensure I passed my ELR roll but the greater ROF of the AT guns and their ability to set up HIP was too good to resist. I also bought one module of 80+ mm OBA and 1 Fortification Point. My massive losses last game ensured that the DR I rolled gave me maximum points.
My depletion DR’s all averaged 6 or 7 and so all companies are full, OBA is normal and my AT platoon was full but only thanks to the historical negative DRM – otherwise I would have started with only 1 of each type of gun (A lesson learnt there: Guns are depleted on ’8’ or more, and lose one Gun of each type so the AT platoon with a pair of 45L’s and a pair of 45LL’s would lose 2 guns where as the much better all-round weapon (76L ART) starts with 4 guns and would only lose 1 if depleted – well worth the extra CPP cost as compared to an AT platoon – unless you can’t afford it like me!!)
My leader rolls also averaged 6 or 7 (the militia unit rolled a DR3 but the +3 DRM made it a ‘6’ – shame I didn’t roll for the rifle squads 1st)
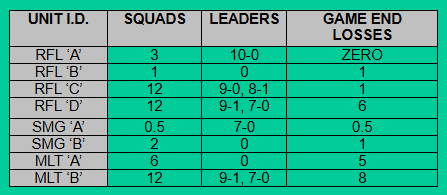
My companies are: Rifle ‘C’, Rifle ‘D’ (both in reserve) and Militia ‘B’ (on board) along with an AT gun platoon.
SETUP
The tattered remnants of RFL ‘A’ & ‘B’, MLT ‘A’ and SMG ‘A’ & ‘B’ will hold the centre of the board in the Southern Foundry Hall, Gun Construction Building and the Gun Tube Hall. These troops are supported by all but a platoon of Militia ‘B’. RFL ‘D” holds the left flank 6 hexes back from the start lines while RFL ‘C’ holds the right flank a same distance away from the start lines. In this game I have stacked the units 2 or 3 high in a number of places so when they get activated they are a more potent force and I went light on the available dummy cloaking counters so it looks like a single company in reserve rather than 2 companies. [Legions Edit: Wow, great move JP, and it worked]
Both of these companies have a platoon in reserve defending The Plant, Gun Hall and Central Manufacturing Halls should he be able to brush aside the defence in the centre of the board. The missing platoon from Mlt ‘B’ is spread out along the front line on both flanks along with some dummies just to make him waste a turn or 2.
My AT guns are in:
● C23
● I22
● V21
● II24
I have HIPS in:
● 447 MMG, 9-1 – LVL 2 O18
● 527 – O16 – for counter attacck and general CC surprise.
● 7-0 Phone – LVL 2 BB24
● 426, MMG, MTR, 7-0 – II24
As can be seen, II24 is a strong position but all HIP, I have a dummy cloaking counter in the hex along with a 1SQ foxhole just to make him think it is tying up the end of my line but in fact the MMG, MTR and AT gun have clear LOS right across to Z19 as well as holding the mouth of the gully.
The MMG in LVL 2 O18 is for shooting into the holes in the roof of the Gun Construction Building or getting some long range shots at his reinforcements as they arrive I am hoping he will assault move from O14 into O15 where my MMG can strip his concealment and then he advances (or I advance in my turn) onto my HIP in O16 for a quick and early CC kill – either way this MMG must fire early in the game and then run downstairs as I don’t want any arty observer to have LOS and drop an OBA mission on the factories, the leader will also be needed in the Southern Foundry Hall for rallying purposes.
The HMG’s in the reserve rifle companies are in H19 (along with 3 squads, a 9-1 leader and a LMG) – these guys will hold the open terrain on the left of the Southern Manufacturing Hall and relocate the HMG into level 2 J21 as soon as activated. The other HMG is in T21 along with 3 squads and a 9-0 Commissar, this position can help hold the terrain on the right of the Gun Tube Hall and also put a fire lane across the front of the V21 AT gun.
My OBA observer will put his OBA along the front of the right flank or even on the factories themselves if necessary.
My last surprise is a 6 factor minefield which I can not reveal yet as it was not discovered and is still in my territory. I also have 2 of my few 1st line squads in U18 which have 12FP and can blast anyone trying to get into the Gun Tube Hall from the right, this position can not be seen by most of his start lines so it shall be the anchor of my right flank and their –1 stealthy ambush roll shall make them my counter attack troops (on a limited scale).
I also have a pair of Mortars in Y25 where they can stop some lateral movement by shooting down the Y14-Y25 road. The left flank is the obvious place for him to attack as his reinforcements will be in the action on turn 2 but my right flank is the area that is the most vital and so has the largest amount of support.
THE PLAN
To survive the onslaught.
Now, I know Legion is a fan of propaganda and would put Goebbels to shame so I am going to write this down now for all to know: I am giving him 25 building locations!! Buying reinforcements has meant that I have had to setup a little further back and that is the price I have to pay to get 3 companies of infantry.
The question becomes: What will he do? He has 19 squads left but also has 5 MG’s medium or heavy and a pair of mortars so lets assume 3 squads are manning all of those. That leaves him with 16 squads to attack: The obvious attack is down the centre of the board avoiding my flanks and therefore not allowing my reinforcements into the game but I have 20 squads in the front line and although they are militia the fanatic factory bonus makes them morale ‘7’. I also have another 7 reserve rifle squads across the D20-FF20 road so I feel he will be slowed down in that area, the down side being that my militia will not be good in CC due to their +1 lax DRM. An attack down my left (West) flank would have the greatest chance of success but my militia would be able to either pull back to tie off the left flank or attack northwards and then swing left to isolate any attack. I think he will attack my right (East) flank with the majority of his on board troops for 3 reasons:
1. It would take 3 turns for re-enforcements to reach it which would not give him much time to make good gains.
2. He has stated that he is concerned about his losses taking the factories and outflanking them would get them for him cheaply.
3. He did so well attacking down that side last game as his AFV’s used the bypass freeze-sleaze to great effect.
His probable attacks would be an initial assault on my right with a holding force in the centre factories while his reinforcements attack the left flank on turn 2 with some of them crossing over to help the centre start attacking in turn 2 or 3. Whatever he does my troops in the centre will have to react and I dread the idea of the Militia moving out of the factories and attacking as they will just melt away. On my side is the knowledge that I have a good squad ratio (48.5 to 31 – assuming he only buys 1 company and if he buys 2 companies then that means he gets few toys like tanks, stuka and OBA so I won’t complain)), last game I had 52:36 and I now have 4 AT guns instead of 2 so there is cause for confidence on my behalf.
I am fairly certain he will buy more AFV’s as they did so well for him last game so I expect his buys to be something in the order of: 1 Company infantry – probably Sturm for their better morale (he is always frugal with his manpower buys and I would be surprised if he bought 2 companies… after all he only gets 30 companies in a 30 scenario CG) a platoon of tanks, Stuka (he loves his planes) and OBA with a pre-reg hex (he has never bought OBA without a pre-reg hex in any CG we have played). Which is a formidable force but not overwhelming, my biggest concern is if he buys 2 companies and tries to overwhelm my line in a small area like the militia held factories so he does not activate too many reserves but that plan is not in his attacking style as he prefers to put pressure all across the line and pour through whatever hole he creates regardless of where it is and I still have 7 squads cloaked behind my militia as a rear guard.
TURN 1
Well, how wrong was I?? He has pulled right back on my right flank giving me the toe-hold he had in the Commissars House for free. He has a company in reserve – mainly in that area, which also surprised me. I am not complaining but I thought this would be the ideal turn for him to keep the aggression happening. As I feared he is going for an attack through the central factories straight into the battered remnants of last game’s troops, he has 6 really big stacks there and is obviously just going to shoot his way through rather than do any fancy movement (initially…).
He only moved 2 platoons on board at A13 and A8. His mega stacks went Opp. Fire so they can kill any of my guys that become exposed and he lost a half squad from a 6,6 booby trap when it tried to deploy. 3 squads moved towards my picket line at B17 and I broke a half squad in that attack as well as having a squad activated from my reserves. The troops from A8 are going east across the board to join in the fun at the centre. I was able to spring my trap at O15 to no avail, the MMG and squad in O18 exposed themselves and fired but the target passed the 2MC (with a ‘4’ which spawned a sniper and it attacked the newly entered guys at A8 breaking a squad there)– and then waltzed into O16 and exposed my HIP squad in that hex, it survived the RF when it got bounced back to its original hex but broke when the now exposed squad fired. Another HS got broken in P15 but at a cost of revealing 2 more concealed units.
A DC on the wall of K15/16 broke the squad in there (clever move…) and a concealed stack moved into the rubble at J15; I did not fire the adjacent concealed conscript hoping that he would be scared of CC. His larger stacks only AM’ed forward and this is obviously becoming a surgical strike using weight of firepower and not an all out assault – I might be able to contain these guys…
My defensive and my OBA came on to the scene but has little targets, Ideally I will keep the SR on board but not convert to FFE as this game seems to be a “filler” before the next big assault on the 19th (why else would he buy a company of infantry in reserve?). One of my AT guns (I22) exposed itself and fired at his sole remaining tank (I14) for no hit. The rest of my defensive was ineffective although I did kill one of his broken half squads.
His advancing fire saw the DC on the wall explode and break my 447 and a pair of conscripts also broke (we thought they were Disrupted – but they are fanatic so they cant Disrupt – phew) another conscript went berserk and the Southern Foundry is suddenly becoming an ugly place to be. In the Construction Building a squad died from HMG ROF shots but little else.
In CC he advanced into my concealed conscript and there was no ambush, he was 2 squads to my one and we both scored a CR against each other BUT he rolled a pair of RS ‘5’s and so lost 2 HS in the process.
In my turn my AT gun failed to damage the tank and it failed to do any damage against the AT gun, mathematically this is a duel that I will win, it is just a matter of time but the longer it continues the more I get concerned. My berserker charged a HMG, MMG 9-2 hex to make the MG’s set a covered arc so the few troops left in the Foundry could regroup a few hexes further back – a brave sacrifice and they paid the ultimate price. I sent 3 squads and my commissar to the Foundry to rally and shore up the defences and the rest of my troops sleazed out of his LOS only to advance back into their respective factories in advance, I also moved some troops from the Gun Tube Hall closer to the action.
In his defensive he CR’ed my broken 447 and I gained 2 snipers – one pinned a squad and the other wounded an 8-1 leader. My guys in level 2 O18 AM’ed downstairs and both got broken, routing out and leaving the MMG there but I advanced a conscript upstairs to take it over next turn. The melee was a no result for either of us. At turn’s end I have a Commissar in the southern foundry stacked with 2 broken conscripts and a half 447 so I should be able to rally them up and that will give me 6 squads in there with a 7th waiting to enter.
Russian: 5cvp
German: 7cvp
THOUGHTS
I am surprised that he bought a reserve company but relieved at the same time, I only have one of my 4 AT guns in a position that could come under threat at this stage which is good as I expect him to buy armour next game. My biggest problem is his –2 leaders, they are stacked with a pair of squads and a pair of medium or heavy MG’s, these guys are slowly assault moving and advancing down my factories and the +1 factory hindrance is not enough cover for my guys to survive his shots, I will try to kill the supporting manoeuvre troops and then circle round behind the –2 guys to isolate them next game as I really can not afford to lose the troops required if I wanted to take them head on.
TURN 2
He started the rally phase with one of his broken half squads going berserk, my commissar tried to rally his troops and one of the conscripts CR’ed through failing while the other HOB-ed up to a 5-2-7.
His prep was small although it disrupted the conscript I had sent up to level 1 O18 to retrieve the MMG – I will have to leave that and the squad behind to be taken in later turns. In his movement his berserker charged into a hex with a 5-2-7 and my defensive fire spawned a ‘2’ SAN which pinned my AT gun. He kept assault moving down the centre of the factories while his units that had entered at A8 started heading south instead of east. He also bought on his last 2 platoons at A17 where they immediately joined the action and at V1 where they headed south to have some fun. His tank started up and my pinned AT gun took its shot, scored a hit and a possible shock but he passed the MC, it then crashed into the Southern Foundry and promptly bogged.
In his advancing fire he broke the HS in melee at J16 as did one of his HS’s but his last unit in the melee took out my guy as he tried to withdraw. A shot at my commissar and friends took out the conscript that did not rally but did no other damage. In CC his berserker CR’ed my 5-2-7 but was itself eliminated.
In my turn 2 the rain started falling and I saw an opportunity to take out a pair of HS and went for it, I pulled troops back and activated the H19 guys who are now moving to the second line of defence, I have pulled out of the Gun Construction Building and only have a small toe hold in the Southern Foundry but have beefed up my squads in the Gun Tube hall, I am hoping to force him into a smaller area of attack so he cant easily break my lines. I advanced 2 concealed conscripts onto two HS and was successful in both ambush rolls so I went H to H, killed them and then used the “successful ambush” (A11.41) rule to get out of the LOS of the adjacent –2 kill stacks – gutsy and clever if I say so my self.
Final tally at turns end is 11 cvp to him 8 cvp for me which means he has lost 4 squads already to my 5.5 – a fair trade in my book!!
THOUGHTS
Although I am pulling back it is an orderly withdrawal as he doesn’t seem to want to expose his troops to any major risks. I was happy taking out his 2 half squads as he uses them to draw fire and cut rout paths so if he wants more he will have to deploy which means rolling for booby trap and a reduction in one of his mega fire groups. When he reaches my second line I will have a good chance to stop him cold as I will have about 18 squads and 7 more under cloaking counters as compared to his 13 or so squads, more importantly, if he does not attack the Gun Tube Hall I have a chance to scoot around his flanks, this attack of his is not very wide and he has no-one on his flanks so I am just biding my time and waiting for a chance to counter-attack.
TURN 3
His prep was ineffective with a rooftop mortar scoring a CH on a dummy stack wasting a set of snake eyes. He kept up the slow assault move attack, – why not? It’s working and that gains him 2 hexes a turn with minimal risk. I scored a few breaks on his troops (the reinforcements heading south and a squad and leader in the Southern Foundry). His advancing fire hurt me badly though, a DC blew a hole in the wall between K18 and K19 and then the K18 killer stack which had been set to Opportunity Fire rolled a snake eyes and the RS dr selected all 3 units (2.5 squads dead) this was my defiladed strong point and the DC trick worked well to destroy it, I will now have to run out of this building as I need more squads into the action and that means getting him close enough to my reserves. He advanced a concealed stack against an exposed 1st line squad in C19 which in CC and although he did not get ambush he was able to kill my squad.
The rain stopped as fast as it began. I had minimal prep as I was now planning on falling back to my 2nd line of defence (the i21-u21 road), the HMG toting squad got broken as it tried to go up the stairs in J22 but the leader grabbed the HMG when they routed away. I activated a pair of reserves and one went to C20 in The Garages to reinforce and hopefully CC an adjacent German HS. The other was in F19 and moved west to reinforce the same area. I AM’ed a concealed squad downstairs in C18 for some CC revenge vs. the squad that had killed my guy in C19. On my right flank I sent a squad up the road at Y19 to support the other squad that had taken the Commissars House and my HIP 7-0 and squad in II24 also came on board and went down the gully with a view to taking the Water Pump Shed in HH16
His defensive saw a conscript break and then CR and my AT gun crew break. I need to get the conscripts into factories quick or they will melt away under his fire. In rout he voluntarily broke his HS adjacent one of my men and it routed to a position where it was adjacent to another one of my squads – strange, I thought…. Naturally I advanced into CC against him and also the C18 squad and my leader with the HMG advanced into level 2 K22 where he met another squad that will take over the HMG in rally… The broken guy died in an ambush but the big attack at C18 was not an ambush despite my –3 drm and in CC I failed to hurt him while he scored a CR against one of the squads.
The score is now 20 CVP to him and 9 to me – this has been an expensive turn with me losing 4.5 squads to his 1 half squad.
THOUGHTS
Not happy with The Garage attack, if that CC had been an ambush or even a squad-for-squad trade off I would be winning in that area but now I am concerned as he can reinforce the Melee. I still have not found a way to counter his –2 kill stacks but now I am in a different building at least I will have a net +1 (or more if debris is involved) which might allow me to keep some good order troops in the front line.
TURN 4
This turn was a pain – mainly because the server dropped us out 4 times!!
I CR’ed a broken conscript through failing to rally with a commissar but my AT Gun crew came up so all is good(ish) and a squad grabbed possession of the unattended AT gun to pose a very minor threat to him. He kept the pressure up and I activated a pair of reserves that fired for no result, similarly my HMG in level 2 of K22 fired through the roof of the Southern Foundry for a no result – shame, that was a good trap and he walked straight into it. He ran a squad into the Gun Tube Hall and it got broken with some PBF and eventually CR’ed from some other shots in defensive. His tank by this stage had unBogged itself and bashed into J18 where it Bogged again.
He has started heading south near the Commissars House so I had to convert my OBA SR which had been scooting around trying to scare him without actually being converted. It scored a PTC which held a squad in its death grip. His Advance fire with a load of –2 fire groups into a target rich environment only managed to CR a broken half squad (phew…) although a shot into the C18 melee hex saw both our squads pinned. Rout saw my disrupted guy in the O18 MMG hex die for FTR. He advanced a squad into the melee and in CC I lost a squad as did he. He also attacked my guy defending the Commissars House and the conscript died but took a half squad with it.
In my turn the commissar reloaded his makarov pistol and continued shooting the cowardly conscripts (one squad dead from this officer…. With friends like this, who needs enemies?)
I have no prep other than the OBA which was ineffective. In movement I took the Water Pump and started moving back to the nearest gully exit to try and get to the now undefended Commissars House. I bumped a concealed HS in S16 to strip concealment for a possible CC encounter with my 2x 1st line squads in the Gun Tube Hall. I also pulled squads out of R19 into S19 to firstly get out of the LOS of his 9-2 death star now residing in level 1 P18 and also to tempt one of his squads to enter the rubble hex Q20 which will activate the 3 squads, HMG and 9-1 in T21. His defensive saw my HMG squad break as it AM’ed towards the stairs (this HMG is cursed) this time the leader could not retrieve it as he was pinned. A SAN broke the squad of his that was nearest to the empty Commissars House (nice…but I think he will win the race to it…) and a broken conscript went berserk – probably due to lead poisoning as he seemed to fire an entire division’s ammo supply at it.
In rout he broke the bumped HS and I sent a concealed SMG squad into S16 while a concealed 1st line squad went into U17 hoping to hold the right flank and make his troops in V17 move south so they can activate some more of my reserves. I also advanced a concealed squad in the garages into CC against an exposed HS, did not get ambush but went H to H anyway and missed, he then killed my squad (I rolled a ‘10’ he rolled a ‘3’ so it would have meant death even if it was not H to H.) In the melee hex my HS died for no result and I also advanced a squad into CC against a single leader and also died – not a good end to the turn.
The score is now 33 –13 cvp and this is starting to hurt.
THOUGHTS
The Garage battle is nearly over with, just like at the Railway Offices last turn, some lucky CC DR’s on his behalf winning the day. I think I can hold him off for another turn or 2 but definitely want it to finish in turn 6. I still have a few surprises, a cloaking counter that has not activated at F21 hoping his F19 FG moves into the open, the T21 mega-death units and my minefield but that is about all I have.
TURN 5
We both had a good rally and my leader was able to find the HMG and the crew found the AT Gun.
His prep saw a mega death-unit roll snake eyes (after he had HOBed up a hero in rally) and KIA a conscript in the gun tube hall. Other than that there was little prep. His movement saw him shift his attack across to the Gun Tube Hall and, although I broke 2.5 of the attacking squads a 9-2 leader, elite 468 which HOBed up to Fanatic, squad and MMG managed to get a toehold in the north western corner. My reserve in F21 scored a K/ result against a dashing HS scout but could not do any damage vs the 2nd scout. I exposed my C23 AT gun (getting desperate for fire power over at The Garages) and even though I scored a CH on a HS it survived. He also sent the V17 squad and a ldr into the Gun Tube Hall from the east trying to pincer me out.
My defensive was a disappointment, he had 1.5 squads broken and next to my troops and all survived the final fire (it was only +1 for factory..) worse, he scored a SAN which broke my F21 squad that was literally holding the centre of my left flank on his own. Overall it was a great opportunity to kill some squads and it all missed or he passed the MC’s – I ended up worse off after defensive than when I started!!! I had to voluntarily break my S16 squad as it had been bumped and lost concealment while he still had a concealed unit adjacent to it. At least something is going well, he advanced a HS into LOS of 3 more reserve squads with a HMG and a commissar. In the rest of his advance he went into CC against my last squad (concealed) in the garages, we both had a –3 ambush drm due to his –1 leader. We failed to get an ambush and he CR’ed the squad while I did no damage. In U17 we failed to ambush and killed each other, I lost a 527 and he lost a squad and leader, the score is now 38-17 cvp.
In my prep my OBA continued to do no damage but my C23 AT gun CRed one of his HS. My i22 AT gun went intensive fire at his bogged tank in a desperate attempt to kill it so I can dash a squad across to the F21 area to bolster that defence but a ‘10’ malfed it. My berserker died in a hail of bullets and my dashing squad was broken by the tank. Other than that I sleazed out of his LOS where I could and sent my newly activated squads into the Gun Tube Hall as they could not pull back without taking a 12fp +1 shot – and that was if they kept concealment and assault moved!!! His defensive was ineffective due to me hiding well but he did manage to blast 2 dummy reserve counters back to their version of dummy heaven. CC saw my melee HS in The Garages die for no loss on his behalf. Sadly, even though I had not rolled a ‘1’ all game (and had about a dozen SAN- in fact I did not roll a ‘2’ either) I rolled a ‘6’ so the game continues.
Final score is 41 –18 cvp which is still more than the 1.5 –1 loss ratio I need but I feel I am slowing him down and might get a game where I can get a better ratio.
THOUGHTS
He seems scared to cross the i21-u21 road which suits me, I only have 4 squads in the front line there – all concealed, more to make his –2 fire groups attack them so they can not cross but I still have a good half a dozen squads ready to counter attack any one that makes it across. I also feel that he will not take all the Gun Tube Hall this game as I have a numerical advantage there as well. Overall, it looks survivable except at row ‘F” where he will make some gains.
TURN 6
My AT gun did not repair and neither did the 2 squads in row ‘F’ which means he will get some good ground in that row with no risk.
His prep saw one of my conscripts in the Gun Tube Hall die a horrible death being broken and then a snake eyes K/ the guy to nothing but he achieved his job of forcing that fire group to stay still and fire rather than move. (I would love a buck for every time one of his –2 firegroups has rolled a snake eyes in this game). He took the remainder of the abandoned Commissars House (I realise that I made a major error here, earlier I sent a squad and leader to re-take the Pump House on the shore trying to get him to re-locate some troops towards it but he didn’t take the bait, I should have sent them into the Commissars House and kindled the thing.) A HS tried to dash into M22 and the cloaked guy exposed himself and fired as did another squad but he survived – and the M22 squad got broken in Adv. Fire and so he was finally able to get a man across the road. Meanwhile his tank started up and promptly got Bogged in the debris hex I19 – it has travelled 3 hexes and got bogged in all 3 this game!! A snake eyes from the AT gun crew caused a NMC on his exploiting HS in row ‘F’ but he passed and was able to take his objectives.
On my left flank I am trying to keep the 45L AT gun out of his reach which is hard as it is getting assaulted by 5 squads and it only has a conscript for company – he attacked cautiously obviously scared that I might have a surprise in the form of the cloaking counter – once again these things have proven to be invaluable. The crew for the malfunctioning AT gun died from double break in advance fire but little else happened.
In my turn a commissar in the Gun Tube Hall shot a broken conscript squad for failing to rally. In my prep I tried to kindle The Plant (J22) and the Gun Tube Hall – strategically I can not hold these guys for long and I thought some nice blazes along his planned attack routs would help me but the J22 leader failed the TC and The Plant squads both rolled low – was a nice plan, shame it didn’t work… I pulled nearly everybody back from the front line except one concealed squad that advanced into P21 with the intention of taking P20 to enable me to put my reserves a little closer to the front and, although it survived fire from one of his –2 mega groups it then broke from 2 squads armed with LMG’s and then another –2 mega fire group which rolled….yes, you guessed it…snake eyes and they died gloriously for the motherland. In CC I rolled a ‘1’ and the game ended.
I lost my malfunctioned AT gun in the post game wrap up and he lost both of his wounded leaders leaving the final score at 50-22. I dropped a SAN level but gained a 9-2 from leader hardening and also hardened a 5-2-7 into a 6-2-8 which was a good deal in my book and I would recommend any body playing RB to ensure they have a few 5-2-7’s around just for this purpose – and they are great in CC against his Sturm squads. His bogged tank rolled another 6,6 and was Immobilised in place which is good news for me.
THOUGHTS
This game was more about getting FP kills than gaining territory, if his reserve company had been on-board I could have been ripped apart. I am certainly in a better position than the end of last game as I have 26 squads (as compared to 12.5) 8 leaders (as compared to 2) a pair each of HMG’s and MMG’s, 4x MTR’s and 3x AT guns but he has 3 full companies to throw at me next game not counting a fourth that he will probably buy so it shall be a tough one with squad numbers being level. I need to find a way to kill his squads and fire groups with out taking the losses I am currently taking. Once again my losses were greater than 2-1 which is a losing equation.